Review of Khoikhoi Paper House & Village

A mom who recently ordered the 3D model of a Khoikhoi House & Village sent me photos of her beautiful daughter Chloe, nearly 9 years old, creating her little Khoi family around their grass mat covered hut and the Khoi village background.

She wrote,

Here is Chloe assembling her Khoi Khoi village.

She really enjoyed putting it together and it definitely made the story of “Ghamka” more real.

~ Lianne

I love that young children can colour in, cut out and assemble these paper models on their own or with a little help and explanation from a parent. I love Chloe’s look of delight with her finished Khoi village!
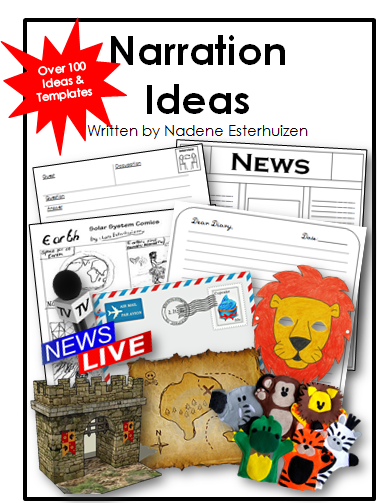
Ghamka” is one of the wonderful many living books covering the history of South Africa in the Footprints On Our Land curriculum. Read alouds come alive when children retell or narrate the chapter using props, models, puppets or hands-on activities.

I found that children love to interact with their paper models. My children and grandchildren added additional paper characters or props to re-enact the story they have listened to. Encourage your children to research further if there is a spark of real interest; let them watch suitable YouTube videos or loan books from your local library.

My children loved to dress up as described in the story. When we read “Ghamka they actually built a Khoi hut using my set of grass table mats pinned over the frame of a little dome tent. Then, of course, they wanted to eat Khoi food inside their tent. The history story became their story!

Order your African houses & villages paper models on my Packages page. If your family has ordered and made any of them, please would you email me to share your review and photos – I would love to see their creations!

You can find all my African houses paper models in the series —

Blessings, Nadene

Questions about South African Artists download

 A reader ordering my South African Artists download asked ~

I just wanted to check with you if the artist study would be suitable for children aged 9, 7 and 5 or is it mostly aimed at older children?

Another reader asked,

“I am new to Charlotte Mason and wondered how to use your South African Artist download?”

Here are my responses~

This  South African Artists download is designed for middle and high school students for Art History & Art Appreciation. This download includes simple biographies, Internet links and at least 4 examples of each artist’s works, as well as a blank biography page. I used it with my children when my youngest was 6 or 7 years old, and her siblings were around 9 and 13 years old. 

Esther Mahlangu's gallery

The wide variety of art and artists that I included in this download covers notable South African artists from the 19th century to modern contemporary artists. The art ranges from classical oil paintings to modern sculptures, classical to contemporary art, both male and female artists, and includes both European as well as indigenous artists. Many of the artists produced landscapes or portraits, some were sculptors. One South African artist’s traditional Ndebele style was famously used to paint a car and even an aeroplane! 

I believe in exposing children informally, regularly to fine arts each week in our Fabulous Fine Arts Fridays.  Following a Charlotte Mason approach, we studied and appreciated one South African artist for a month, focussing on a new art work each week. The aim is to appreciate the artist’s style, content, method, materials and message in their art.  In the first week, I introduced the artist, read their biography and we viewed one new art work.

Helen Martins

I used larger images of the art work on my laptop, zoomed in to fill the screen, to appreciate the art. I encouraged detailed observations, informal discussions regarding the subject of the painting, the style and colours, and any message they personally experienced. Sometimes we looked at other works online, and maybe added further research. Then each child responded with their narrations. Some weeks we included supporting art activities to imitate the art work. Sometimes we copied the art work, or coloured in an outline drawing of the art or made clay or paper mache sculptures.  Most times, we simply looked and then discussed the art work. Don’t worry if you don’t have anything to “show” for your Fine Arts lessons.  It doesn’t have to be recorded or written or filed.  Just talk with your children and listen to their interpretations, encourage their creativity and personal connections.  Look for ways to for them to “make it their own”.

All this to say that perhaps your 5-year old may simply enjoy the exposure, whereas your older two children could gain a deeper art appreciation experience.  May I suggest, because art appreciation is so personal, choose the art that you enjoy and relate to from my South African Artist collection.  You definitely do not need to do them all!  

Scroll to the bottom of this post for your FREE SAMPLER of this download.

Please pop over to my Packages page to order your downloads.

Blessings, Nadene

  • Subscribe Click to receive all my new posts packed with practical tips, projects, plans, pages & art ideas by email
  • Facebook Follow Practical Pages on Facebook

Create a “No-fail” Unit study

Recently Hannah Savage shared her “no-fail” Viking unity study on Instagram. She wisely shared,

“When I see my job through the lens of laying a feast without tying my success to an idealized outcome, I free up my heart to enjoy the unit with them for however long it lasts and whatever it ends up looking like. My “low stakes” approach feels like a friendly invitation to them rather than a tight-knuckled force feeding. It’s an awareness many (many) fumbles in this homeschool life have taught me.”

@hannahsavagewrites

Lovely, right? It sounds like my recommendation to offer a learning buffet and allow your children to choose what they want from a delightful array of books, projects and options.

Among all her wonderful resources she found for her unit study, she linked to my free Viking Paper Men and Dolls.

If you looking for a wide variety of ideas for your children to express their learning, I have created a Narrations Ideas Booklet filled with over 100 creative project optionsalternative suggestions, practical tips and templates for every age and learning style. You can order your booklet on my Packages page.

May Hannah’s “no-fail” unit study approach inspire you to be brave and creative and curate your own “no-fail” unit study on themes or topics your children are passionate about!

Blessings and much grace, Nadene

  • Subscribe Click to receive all my new posts packed with practical tips, projects, plans, pages & art ideas by email
  • Facebook Follow Practical Pages on Facebook

Khoikhoi House & Village 3D Model

Here is my latest 3D paper model in a series of traditional African houses and villages ~ Khoikhoi House and Village.

You can view the other African houses in the series — Zulu House & Village, the Xhosa House & Village and the San Bushmen House & Kalahari Desert background which are excellent hands-on activities that fit perfectly with Footprints in our Land, our South African literature-based Social Studies curriculum.

The paper model is a 6-page purchase package download that includes both black & white outline illustrations as well as coloured-in pages. The village background is a 1-page triorama which forms a triangle/ pyramid-shape when folded. These illustrations include clear assembly instructions and some extra cultural details. I provide some additional basic historical background information as well as Internet reference links. 

The Khoikhoi were the original nomadic pastoralist indigenous people who lived in the southern parts of Africa and farmed with sheep, goats, and cattle. They traded with the seafarers and early settlers who landed at the Cape in the1650’s.

The Khoikhoi village was relatively large, and the Khoikhoi lived in round huts covered with reed mats that could be dismantled and re-erected in a new location when grazing in the area became depleted.  Each village had a headman who made decisions with the clans about when and where to move. There was a group that was more sedentary known as “Strandlopers” who live by hunting and gathering food along the beaches of south-western Africa, originally from the early Cape Colony.

This grass hut template may look complex, but I have designed it so that most middle-school-aged children should manage to assemble the hut on their own.

Colouring-in, cutting out and creating paper houses and village models are a wonderful activity while mom reads-aloud.

These South African house and village downloads are purchase packages and I really appreciate your support, but I would love to share a freebie with you. Each house comes with a triorama background. A triorama forms a wonderful 3D pyramid shape with a base. It requires just 2 folds and a snip to make, so it’s very simple, but looks dramatic!

Please pop over to my Packages page to order your download. Thank you for your support.

Blessings, Nadene

  • Subscribe Click to receive all my new posts packed with practical tips, projects, plans, pages & art ideas by email
  • Facebook Follow Practical Pages on Facebook

San Bushmen House & Village 3D Model

I am happy to share my paper model of a traditional San Bushman House and Village.

Colouring-in, cutting out and creating these paper models are excellent hands-on activities that fit perfectly with Footprints in our Land, our South African literature-based Social Studies curriculum.

You can view other traditional African houses in this series Zulu House & Village, the Xhosa House & Village which .

The San, also known as Bushmen, are the oldest native tribe that live in the vast Kalahari Desert regions of South West Africa. They lived in southern Africa long before European settlers and other Bantu tribes arrived. They are nomadic hunter-gatherers, and they set up temporary camps as a family-based society.

The 3D model of a San Bushman grass hut and the Kalahari Desert camp is a 6-page purchase package download that includes both black & white outline illustrations as well as coloured-in pages. The background is a 1-page triorama which forms a triangle/ pyramid-shaped folded. These illustrations include clear assembly instructions and some extra cultural details. I included some additional basic historical background information as well as Internet reference links. 

This grass hut template may look complex, but I have designed it so that most middle-school-aged children should manage to assemble the hut on their own.

These South African house and village downloads are purchase packages and I really appreciate your support, but I would love to share a freebie with you. Each house comes with a triorama background. A triorama forms a wonderful 3D pyramid shape with a base. It requires just 2 folds and a snip to make, so it’s very simple, but looks dramatic!

Please pop over to my Packages page to order your download. Thank you for your support.

Blessings, Nadene

  • Subscribe Click to receive all my new posts packed with practical tips, projects, plans, pages & art ideas by email
  • Facebook Follow Practical Pages on Facebook

What’s new in my “Teaching Print Step-by-Step” Ebook?

So many parents need help to teach their child to write. Over the years of homeschooling, I have had wonderful success using my laminated handwriting charts.

I have just completely updated my Teaching Print Handwriting Step-by-Step Ebook which is now a 16-page booklet. It includes new detailed instructions & examples on line placement for writing on lined notebook pages, starting & ending points for each letter, as well as new charts that include coloured numbered dots and arrow guidelines.

Here’s what you’ll find in this Teach Print Handwriting Ebook ~

  • Introduction to Teaching Print Handwriting Step-by-Step
  • Why laminated charts work
  • Step-by-Step Handwriting Lessons
  • Getting to know the lines and letter placement
  • How to start teaching print handwriting step-by-step
  • Examples of how to talk through each lower-case letter
  • Print lower case with start & end and arrows (a-o)
  • Print lower case with start & end and arrows (p-z)
  • Print lower case with arrows
  • Upper Case print chart with start & arrows A-N
  • Upper-case print chart with start & arrows O-Z & Numbers 1-9
  • Combined print upper-case and lower-case chart

Would you please support me and pop over to my Packages page to purchase the updated Teaching Print Handwriting Step-by-Step booklet.

If you wish to write a private email to me, please fill in the contact form on my About & Contact page.  I would love to help you!

 Blessings, Nadene
  • Subscribe Click to receive all my new posts packed with practical tips, projects, plans, pages & art ideas by email
  • Facebook Follow Practical Pages on Facebook

Line Placement Hints for Handwriting

When your child first starts to write on lined notebook paper, it can be very confusing! Where to start?  Where to skip lines so that letters don’t crowd into each other?

We use laminated handwriting charts to teach print and then cursive letters, first working on lower-case and then going on to upper-case letters.  I have several Ebooks on my Packages page that will teach letter placement, as well as the starting and ending points for each letter.

Once your child can confidently trace over their laminated handwriting chart without making mistakes, he is ready to start Copywork.  Copywork is a wonderful way of practising handwriting in a very meaningful way.  Read all about Charlotte Mason.

Copywork is best done on lined notebook pages.

Here’s a good rule when teaching ~

ALWAYS START BIG AND WORK SMALLER!

When you start writing on lined notebook paper, first use broad lines.  You can find 17mm lined books at your stationery shop.  Then go on to normal feint & margin pages before using the narrow Irish lined paper.

Before starting, first, draw simple little hints in the margin to help know where the body line begins.

We used these 3 hints:

  1. Draw a simple “Cat” in the margin to allow 3 lines of regular notebook pages for the head, body and tail.
  2. It may be quicker to draw a “lollipop man” in the margin. The round shape is the “head” and the stick is the “body”.  The “legs” are where the cat’s tail would be.
  3. The fastest method is to make a clear dot in the body line. My kids would count “Skip-dot-skip-skip-dot-skip-skip-dot…” to quickly place a dot marker on every 2nd alternate line all the way down their margin before beginning their copywork.

With these hints, your child will soon easily know where to start their writing and be able to do beautiful copywork.

Please support me by ordering my Handwriting Tips and Teaching Print  & Cursive Handwriting Ebooks on my Packages page.

If you wish to write me a private email, please fill in the contact form on my About & Contact page.  I would love to help you!

 Blessings, Nadene
  • Subscribe Click to receive all my new posts packed with practical tips, projects, plans, pages & art ideas by email
  • Facebook Follow Practical Pages on Facebook

What’s new in my “Teaching Cursive Handwriting Step-by-Step” Ebook?

I have just completely updated my Teaching Cursive Handwriting Step-by-Step Ebook which is now a 17-page booklet. It includes new information such as Joining cursive upper-case to lower-case letters as well as detailed instructions & examples on line placement for writing on lined notebook pages, starting & ending points for each letter, as well as new charts that include guide-lines and letter placement hints.

Here’s the Table of Contents and some examples:

  • Introduction to Teaching Cursive Handwriting using a laminated chart
  • Why laminated charts work
  • Step-by-Step Handwriting Lessons
  • Getting to know the lines and letter placement
  • Teaching Lower-Case Cursive Letters
  • Line Placement Hints
  • Cursive Lower Case Chart with “cats”, coloured lines and start- & end-points
  • Some fun lower-case cursive handwriting exercises
  • Cursive Lower Case Chart
  • Teaching Cursive Upper-Case Letters
  • Some fun cursive upper-case handwriting exercises
  • Cursive Upper-Case Chart with “lollipop men” coloured lines and start- & end-points
  • Cursive Upper Case Chart
  • Cursive Combined Upper and Lower Case
  • Joining Cursive Upper-Case to Lower-Case Practice Pages A – I
  • Joining Cursive Upper-Case to Lower-Case Practice Pages J – R
  • Joining Cursive Upper-Case to Lower-Case Practice Pages S – Z

Would you please support me and pop over to my Packages page to purchase the updated Teaching Cursive Handwriting Step-by-Step booklet.

If you wish to write a private email to me, please fill in the contact form on my About & Contact page.  I would love to help you!

 Blessings, Nadene
  • Subscribe Click to receive all my new posts packed with practical tips, projects, plans, pages & art ideas by email
  • Facebook Follow Practical Pages on Facebook

How to Join Upper-Case to Lower-Case Cursive Letters

With parents finding themselves suddenly homeschooling during this pandemic, a mom emailed to ask me to help her as she was struggling to teach her son how to join cursive upper-case to lower-case letters.   To help her, I created a little  5-page download which is also available for free right here ~ Joining Upper Case & lower case Cursive letters

How to join an upper-case letter to a lower-case letter

Most upper-case letters will have their own ending line that simply overlaps as the starting line for the next letter.

Only a few upper-case letters will require “an extra” line to start the new lower case letter at their base such as with B C D F H I O P S T V W  I  have drawn this line which will be the overlapping starting line as a dotted line.

Practice Joining Cursive Letters Sheets

  • Laminate the following Joining Cursive Upper-Case to lower-case practice pages or place each page in a plastic page protector.
  • Demonstrate and talk about where to start, how to form and end each letter.
  • Then ask your child to trace over the letters with a whiteboard marker.
  • Once your child knows where to start, how to form and end all the letters in lower- & upper-case, your child can start doing simple copywork as handwriting practice using the chart as a reference.

This download provides practice pages using every letter of the alphabet.  Extended lines provide space to not only trace over the letters but also to copy and write out the joined letters on the coloured lines provided.

I have also included a detailed explanation of letters’ line placement as well as coloured dots for starting and ending points for each letter in this download.

I will post a detailed blog post on letter line placement in my upcoming post.

Please pop over to my Packages page to purchase the updated Teaching Cursive Handwriting Step-by-Step booklet.

If you wish to write a private email to me, please fill in the contact form on my About & Contact page.  I would love to help you!

 Blessings, Nadene
  • Subscribe Click to receive all my new posts packed with practical tips, projects, plans, pages & art ideas by email
  • Facebook Follow Practical Pages on Facebook

Fun Activities For Kids At Home

Here are some creative and fun learning activities links from my blog for your children to enjoy at home as we move into unprecedented changes in our lives with self-isolation and lockdowns due to the global covid-19 outbreak.

May I offer a few practical suggestions with these at-home activities?

  • Look for items that your children would enjoy.
  • Plan for 1 activity per day.
  • Keep things informal.  Don’t try to do school at home!
  • Take your time.
  • Don’t rush through a list.
  • If something sparks joy and delight — stay there and look for other similar activities rather than moving on to the next thing on your list.
  • Repeat.  Especially young children love to repeat an enjoyable activity.  Don’t be afraid to print things out and do it again if your child loved it.
  • Photograph and video them doing their activities.
  • Display their finished work each week on a door or shelf “gallery”.
  • Share their activities with grandparents and social groups to stay connected.

So here we go ~

  1. Paper dolls and paper men from different historical eras to colour in and cut out.  Use these as puppets for narrations.
  2. Narrations are the child “telling back” what he heard in a read-aloud. Narrations are the cornerstone of a Charlotte Mason education.  Children must pay close attention while they listen to the story so that they can make it their own and express what they remember and understood as they narrate.   I have collected over 100 narration ideas for every learning style.  In this Ebook, you will find lists of suggested activities for audio, visual, kinesthetic and creative learners along with templates and printouts.  You can see examples of the templates and ideas in the original post.
  3. Letterboxing – a great “treasure hunting” geography game to practice in your house and garden. Letterboxing is an intriguing mix of treasure hunting, art, navigation, and exploring skills.
  4. Current Affairs is the study of social, political and important happenings in the world at the present time.  Use this Current Affairs download with calendar pages, maps, flags and symbols to chart the events around the world during the coronavirus crisis.
  5. Nature Study and enjoy the great outdoors with fun nature activities in three Smash Nature Journals.  Go to my  Packages page to order your Smash books.  If you order all 3 you get the third book free!
  6. 3D models such as the Little House in the Woods.
  7. Art appreciation activities of famous artworks and famous artists~
  8. Creative projects ~
  9. Bible activities ~
  10. Sight Words are frequently used words that your child should easily recognize in his reading.  In my Sight Words Ebook, you will have all the word lists, words in sentences, games and activity templates.spelling-templates-ideas.png (390×401)
  11. Handwriting practice with laminated charts and games. I have created a 20-page E-book is packed with practical tips and it includes helpful activities and fun pre-writing games to build up your child’s gross motor strength, develop fine motor control and develop their spatial awareness, correct posture and pencil grip for maximum control and minimum stress while learning to write.   Handwriting Tips Booklet $5.00 / ZAR5.00
  12. Hands-on activities ~ Here is a list of some of the many hands-on activities and posts on my blog ~

I hope that these posts and links and downloads inspire you in your homeschooling!

Wishing you all health, happiness and precious family times.

Blessings, Nadene

  • Subscribe Click to receive all my new posts packed with practical tips, projects, plans, pages & art ideas by email
  • Facebook Follow Practical Pages on Facebook