Free Download – Sight Words

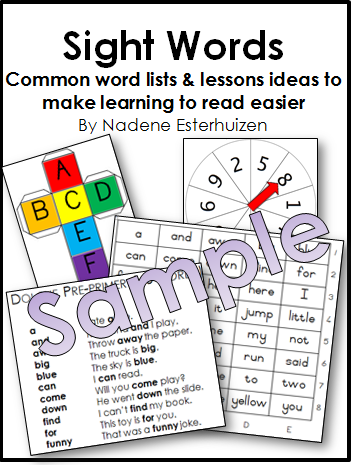
Revisiting archives ~ Offering a FREE Sight Words sampler

Teaching sight words is a very important and helpful tool to make reading easier for young students from pre-K to Grade 3.

Sight words are words read from memory and often cover almost half the reading material on a page.  By memorizing sight words, a child can quickly recognise and read these words without sounding out every letter of each word, making his reading process easier.

Sight words = often also called high frequency sight words, are commonly used words that young children are encouraged to memorize as a whole by sight, so that they can automatically recognize these words in print without having to use any strategies to decode.” – Wikipedia

What sight word lists to teach? There are 3 main sight word lists:

  1. Dolche Sight Words
  2. Fry’s 1000 Sight Words list using more modern words.
  3. First 100 high frequency word lists

Choose a list, introduce one or two words each day, gradually adding a new word or two, repeating and practicing the previously learned words until your child has learnt the entire list. In a short while, your child will have a wonderful, rich memory bank of instantly recognized words which he can read almost instantly, building his reading speed and ability.

Download your FREE sampler  ~ Sight Words Sampler including the Dolche lists with words in sentences and the Dice & Spinner templates.

How to teach sight words? A general rule = Always say the whole word, then spell it out and then say it again, underlining the whole word with the first 2 fingers from left to right. 

As in all teaching, you should customize your child’s lists to suit their levels of maturity and ability.  When they are ready, they will quickly learn new words and enjoy the learning process.

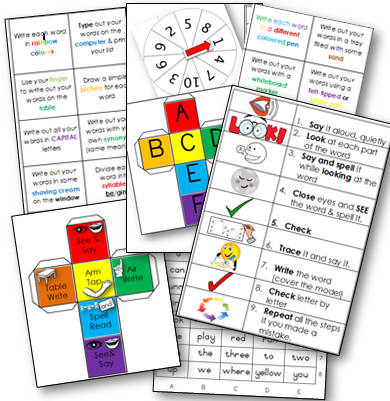
Sight word games to play

The best way to practice is to have fun! Once the words have been taught, the child must practice those words daily.  Many of these games involve physical exercise which, in turn, strengthens core and fine motor muscles and reinforces directions and spatial awareness. 

My full 30-page Sight Words EBook has ready-to-print flash cards, suggested games and activities, templates and posters for fun teaching and learning sight words.

Click over to my Packages page and support me by ordering the full 30-page Sight Words Ebook which includes ~

  • How to teach sight words lessons with detailed examples.
  • 18 Creative Spelling games (one or two players & physical activities
  • 24 Spelling ideas with unique activities &fun ideas
  • Dolch sight word lists with flashcards & words in sentences
  • Fry’s 100 Sight Words
  • 100 Frequently used sight word lists
  • Spinner and dice templates for games and activities
  • Board game and Bingo template
  • Links to websites and YouTube videos

References ~ You will find lots of other lists, flashcards, games and downloads on the web ~

 Blessings, Nadene

  • Subscribe Click to receive all my new posts packed with practical tips, projects, plans, pages & art ideas by email
  • Facebook Follow Practical Pages on Facebook

New Introductions

Hi there! It’s been a while since I have posted here. My blog began in 2009, and many of you have followed my homeschooling journey as I taught my three daughters from kindergarten to graduation. But I am currently no longer teaching nor working on developing educational materials.

This year I began a new career as a freelance artist on Fiverr. As an avid art teacher and art journaler, I often said that I would love to do art every day, and now I am! I spend much of my time painting and illustrating Christian art for clients, and I absolutely love it!

Recently I noticed that there are several new Practical Pages subscribers and I wondered if they would know of the precious posts in my archives. With this in mind, I have decided to repost some of my most popular blog posts now and then. Practical Pages is my treasure trove of practical tips, experiences of what works, encouragement to new moms, and tons of free pages and free downloads.

You are welcome to email me if you have any homeschooling questions and concerns, or any requests for teaching tips and advice. Please click on About & Contact and fill in the contact form and I will do my best to respond.

Blessings, Nadene

Questions about South African Artists download

 A reader ordering my South African Artists download asked ~

I just wanted to check with you if the artist study would be suitable for children aged 9, 7 and 5 or is it mostly aimed at older children?

Another reader asked,

“I am new to Charlotte Mason and wondered how to use your South African Artist download?”

Here are my responses~

This  South African Artists download is designed for middle and high school students for Art History & Art Appreciation. This download includes simple biographies, Internet links and at least 4 examples of each artist’s works, as well as a blank biography page. I used it with my children when my youngest was 6 or 7 years old, and her siblings were around 9 and 13 years old. 

Esther Mahlangu's gallery

The wide variety of art and artists that I included in this download covers notable South African artists from the 19th century to modern contemporary artists. The art ranges from classical oil paintings to modern sculptures, classical to contemporary art, both male and female artists, and includes both European as well as indigenous artists. Many of the artists produced landscapes or portraits, some were sculptors. One South African artist’s traditional Ndebele style was famously used to paint a car and even an aeroplane! 

I believe in exposing children informally, regularly to fine arts each week in our Fabulous Fine Arts Fridays.  Following a Charlotte Mason approach, we studied and appreciated one South African artist for a month, focussing on a new art work each week. The aim is to appreciate the artist’s style, content, method, materials and message in their art.  In the first week, I introduced the artist, read their biography and we viewed one new art work.

Helen Martins

I used larger images of the art work on my laptop, zoomed in to fill the screen, to appreciate the art. I encouraged detailed observations, informal discussions regarding the subject of the painting, the style and colours, and any message they personally experienced. Sometimes we looked at other works online, and maybe added further research. Then each child responded with their narrations. Some weeks we included supporting art activities to imitate the art work. Sometimes we copied the art work, or coloured in an outline drawing of the art or made clay or paper mache sculptures.  Most times, we simply looked and then discussed the art work. Don’t worry if you don’t have anything to “show” for your Fine Arts lessons.  It doesn’t have to be recorded or written or filed.  Just talk with your children and listen to their interpretations, encourage their creativity and personal connections.  Look for ways to for them to “make it their own”.

All this to say that perhaps your 5-year old may simply enjoy the exposure, whereas your older two children could gain a deeper art appreciation experience.  May I suggest, because art appreciation is so personal, choose the art that you enjoy and relate to from my South African Artist collection.  You definitely do not need to do them all!  

Scroll to the bottom of this post for your FREE SAMPLER of this download.

Please pop over to my Packages page to order your downloads.

Blessings, Nadene

  • Subscribe Click to receive all my new posts packed with practical tips, projects, plans, pages & art ideas by email
  • Facebook Follow Practical Pages on Facebook

Comic Strips Tips & Templates

Solar System Mercury

Comic strips are picture stories that convey loads of information and visual detail. They are a wonderful resource for language arts and creative writing activities and make an excellent option for narrations and storytelling.

Here are some comic tips:

  1. Plan out six to 8 facts or ideas for your story on rough paper first. Just think … eight blocks = eight facts?
  2. Look at some real comics with your children before your start to show how a reader reads the dialogue from left to right, from top to bottom if there is more than one “call out” or speech bubble in a block.
  3. When writing the dialogue, first print the dialogue small & neatly, then draw the speech bubble around the words.  This prevents you running out of space in your bubble.
  4. Use different shaped “call out” bubbles – bubbled for thoughts, pointed to a mouth as speech, zig-zag to show radio comments or computer voice.
  5. Add a top or bottom information phrase block if needed, like: Later on … or Back inside
  6. Use the space left after the speech to draw simple ideas. Colour adds to the effects.
  7. Use onomatopoeic (sound effect) words and draw them with style to show something popping, crashing, exploding, squeaking etc.
  8. Be creative!  Have FUN!

Here is your free comic strip template download ~

Most the comics include dialogue written in speech bubbles. In my post Use Comics To Teach Direct Speech I described our effective lesson on how to write direct speech from a comic strip. Here’s a brief summary:

Simple direct speech rules.

  1. Write down the spoken words or dialogue that appear in speech bubbles exactly  as they appear, but inside inverted commas.
  2. Use inverted commas or quotation marks “…”  immediately before and after the spoken words.
  3. Insert punctuation marks that suit the dialogue after the dialogue inside the inverted commas.
  4. Use capital letters to start any dialogue, or any new dialogue that follows a full stop.
  5. Question marks  & exclamation marks act as a full stop.
  6. Use an appropriate attribution for each speaker and try be creative and vary using the word “said”.
  7. Separate dialogue from the attribution with a comma.
  8. ALWAYS skip a line and start a new line for a new speaker. When typing the direct speech on the computer, press ‘enter’ + ‘enter’ again to leave a line open and begin on a new line.

Comics contain a lot of visual information. The scene and actions should be described in words. Adding this to the direct speech, and conveying a flow of action, thought and interest to the written dialogue is a more advanced skill, making a wonderful, interesting story.

In my post Use Comics to Teach Reported Speech, we chose my daughter’s most dramatic comic strip story and she pretended that she was a news reporter, changing her speech dialogue in speech bubbles into reported speech. Once again, we looked for examples of reported speech in our read aloud literature books.  Charlotte Mason’s principle to teach grammar and language arts through living books and good literature is amazingly effective!

Here are Usborne Book of English Grammar basic rules of writing reported speech summarized ~

  • Report what someone said using your own words.
  • No need for inverted commas.
  • Change the verb to the past tense.

This report can then be written as a newspaper report or given as a speech as a TV news reporter.

The comic strip template is included in my more than 100 Narration Ideas Booklet which you can order on my Order Packages page.

Blessings, Nadene

  • Subscribe Click to receive all my new posts packed with practical tips, projects, plans, pages & art ideas by email
  • Facebook Follow Practical Pages on Facebook

Struggles with Maths?

Maths may be a difficult subject for many children and a source of fear for many homeschooling parents.

As a child, I was terrified of Maths and I failed miserably all through high school and needed extra classes with a maths tutor to pass my Matric exams. When I was a student teacher on my 2nd teaching practice, I was given Grade 7 Maths classes to teach. I was appalled. In order to adequately prepare, and so that I wouldn’t be caught out by any student’s questions, I covered the topic using every textbook I could lay my hands on. And you know what? I discovered that I was an outstanding Maths teacher!!! I knew how to approach the concepts from many perspectives and I had a slew of different examples to practice and demonstrate with my learners. I made the lessons fun and relatable. My students enjoyed their lessons and mastered their maths.

So, with this experience, I homeschooled and tutored my daughters’ Maths lessons all the way to graduation. When fear is taken out of the picture, Maths is fairly simple. Maths concepts and applications are straightforward, simple and logical. If you can find the right “fit” for your child in the pace and application, you will be able to help them conquer their Maths battles. I describe 12 successful Maths principles I used in What Works – Maths.

Here are 5 R’s to help when you or your child are struggling with Maths lessons ~

  1. Review
  2. Repeat
  3. Replace
  4. Restart
  5. Refuse

Review Usually struggles in Maths lessons occur when your child has not fully understood a concept. Revise, re-visit, and review the concept. Make sure that your child understands the basic Maths concepts and principles. If there is any hesitation, doubt, or uncertainty, repeat the Maths principle with physical objects, Maths manipulatives, other examples, or relatable applications. Practice previous examples and lessons. Practice is vital before moving on.

Repeat Similar to review, repeat practice lessons using other examples until the Maths concept “clicks”. You may need to look for additional textbooks, worksheets or online lessons to repeat the concepts until your child fully understands and successfully applies the concepts. Take your time! Rushing on will only make the fear and uncertainty worse.

Replace Find alternatives that may be better suited to your child’s learning style. Replace your textbook or practice the Maths lessons with a different book or with online lessons such as Khan Academy. Every author and publication has a unique approach, style, pace and application. You can use a combination of different books and lessons. Don’t feel bad if the Maths curriculum you initially purchased doesn’t meet your child’s requirements. Tailor-make your children’s education and find something else instead.

Restart Start again with the basics. Leave the books and worksheets aside for a few days or weeks and focus on fun activities such as skip counting, multiplication and addition. I discovered that Mental Maths worksheets, drills, songs, card games, manipulatives and activities helped with my children’s speed and confidence. Once these basics are re-established, start again and your child may find the Maths work much easier. This will boost his confidence which will help him conquer his fears.

Refuse Do you need to refuse to teach your child Maths? May I encourage you to consider a Maths tutor when your relationship with your child is harmed by the tension and struggles over Maths lessons? Maybe Dad, a high school student, a kind neighbour or a co-op mom can help teach your child without all the interpersonal battles. Often a 3rd party person doesn’t receive the backlash and resistance and refusal that a child gives a parent. May I also add that a high school child can choose to do Maths Literacy instead of Pure Mathematics? Maths Literacy goes beyond academic focus and aims to give students basic Mathematics skills they can use and apply in their everyday lives. Just check with your high schooler’s career options and tertiary education requirements first.

Maths struggles have a way of getting right in and messing with our souls! Please, please, please … be compassionate to yourself and your child during this phase. Gently put the “offending” book on your bookshelf and offer yourselves time to consider what will work. It is tough to be gracious to yourself and others when you are afraid or offended. Grace for grace. Pray for guidance and grace.

You can find all my Maths freebies here. Feel free to share your experiences in the comments below or or write to me on the contact form on my About & Contact page.

Blessings, Nadene

  • Subscribe Click to receive all my new posts packed with practical tips, projects, plans, pages & art ideas by email
  • Facebook Follow Practical Pages on Facebook

Create a “No-fail” Unit study

Recently Hannah Savage shared her “no-fail” Viking unity study on Instagram. She wisely shared,

“When I see my job through the lens of laying a feast without tying my success to an idealized outcome, I free up my heart to enjoy the unit with them for however long it lasts and whatever it ends up looking like. My “low stakes” approach feels like a friendly invitation to them rather than a tight-knuckled force feeding. It’s an awareness many (many) fumbles in this homeschool life have taught me.”

@hannahsavagewrites

Lovely, right? It sounds like my recommendation to offer a learning buffet and allow your children to choose what they want from a delightful array of books, projects and options.

Among all her wonderful resources she found for her unit study, she linked to my free Viking Paper Men and Dolls.

If you looking for a wide variety of ideas for your children to express their learning, I have created a Narrations Ideas Booklet filled with over 100 creative project optionsalternative suggestions, practical tips and templates for every age and learning style. You can order your booklet on my Packages page.

May Hannah’s “no-fail” unit study approach inspire you to be brave and creative and curate your own “no-fail” unit study on themes or topics your children are passionate about!

Blessings and much grace, Nadene

  • Subscribe Click to receive all my new posts packed with practical tips, projects, plans, pages & art ideas by email
  • Facebook Follow Practical Pages on Facebook

Don’t Teach Nature Lessons!

Nature walks should be somewhat spontaneous opportunities for discovery. Learn from my early homeschooling mistakes and DO NOT treat nature study like an outdoor class time — it kills the child’s natural curiosity and delight!  My older children eventually refused to participate in nature study.  Instead, look for ways to include regular weekly or daily outings in nature and provide some simple tools and methods to encourage your children to notice, explore, engage and enjoy nature.

Charlotte Mason bemoaned,

“We are awaking to the use of nature-knowledge, but how we spoil things by teaching them!” (Formation of Character, p. 396).

Of course mom, you can set a topic of focus and guide your students to look for something specific, but be sure to give them lots of opportunities to observe closely and carefully for themselves with a minimum of input from you.  May I suggest that the reference books are kept in your nature study bag to be used only when a child asks for additional information? Allow your child’s natural curiosity and let them study elements and objects “off-topic” and follow their lead!

“As soon as he is able to keep it himself, a nature-diary is a source of delight to a child.  Every day’s walk gives him something to enter …” (Vol 1, p.54-55)

Here are some of my Nature Study posts, practical tips and free downloads from my archives:

Our Theme for the Day and refreshed Daily Themes provides a simple visual reminder to include all the “extras” in our weeks such as Nature Study, Poetry, Fine Arts, Creative Writing, Geography and Science. 

Daily themes 2015

My three Smash This Nature Journals provide loads of fun, simple, unusual and unique nature journal prompts which inspire joyful nature experiences.  Order and print your Smash Nature Journals to encourage fabulous, fun nature activities!

Smash Nature Journals 123

Making time for nature study with free nature photo of the week chart and Ambleside Online Nature Study Schedule.

Free John Muir Nature Quotes & free Copywork pages include about 10 pages of John Muir quotes in either print or cursive using Charlotte Mason’s copywork & dictation principles.(Of course this is only for handwriting practice and not as part of the nature study lesson!)

How to create a Perpetual Nature Journal with explanations and links on how to create your own perpetual nature journal.

How to make a nature study bag and a sewing tutorial with simple ideas of what to include in a nature study bag.

How to create a Nature Study notice board or shelf and a post on how a simple Nature Tray provides a wonderful way to display the week’s nature finds for collection, further study and drawing in nature journals.

nature tray

John Muir Law encourages how to cultivate curiosity in nature study 3 ways.  He believes that the key to developing a closer connection with nature is by deliberately enhancing your powers of observation and wonder.  He says,Attention is what the fabric of love is made from.”  This post explains his method.

I trust that these ideas and suggestions inspire you to relax or upgrade your Nature Studies in your homeschooling!

All in grace, for grace, Nadene

San Bushmen House & Village 3D Model

I am happy to share my paper model of a traditional San Bushman House and Village.

Colouring-in, cutting out and creating these paper models are excellent hands-on activities that fit perfectly with Footprints in our Land, our South African literature-based Social Studies curriculum.

You can view other traditional African houses in this series Zulu House & Village, the Xhosa House & Village which .

The San, also known as Bushmen, are the oldest native tribe that live in the vast Kalahari Desert regions of South West Africa. They lived in southern Africa long before European settlers and other Bantu tribes arrived. They are nomadic hunter-gatherers, and they set up temporary camps as a family-based society.

The 3D model of a San Bushman grass hut and the Kalahari Desert camp is a 6-page purchase package download that includes both black & white outline illustrations as well as coloured-in pages. The background is a 1-page triorama which forms a triangle/ pyramid-shaped folded. These illustrations include clear assembly instructions and some extra cultural details. I included some additional basic historical background information as well as Internet reference links. 

This grass hut template may look complex, but I have designed it so that most middle-school-aged children should manage to assemble the hut on their own.

These South African house and village downloads are purchase packages and I really appreciate your support, but I would love to share a freebie with you. Each house comes with a triorama background. A triorama forms a wonderful 3D pyramid shape with a base. It requires just 2 folds and a snip to make, so it’s very simple, but looks dramatic!

Please pop over to my Packages page to order your download. Thank you for your support.

Blessings, Nadene

  • Subscribe Click to receive all my new posts packed with practical tips, projects, plans, pages & art ideas by email
  • Facebook Follow Practical Pages on Facebook

How to Join Upper-Case to Lower-Case Cursive Letters

With parents finding themselves suddenly homeschooling during this pandemic, a mom emailed to ask me to help her as she was struggling to teach her son how to join cursive upper-case to lower-case letters.   To help her, I created a little  5-page download which is also available for free right here ~ Joining Upper Case & lower case Cursive letters

How to join an upper-case letter to a lower-case letter

Most upper-case letters will have their own ending line that simply overlaps as the starting line for the next letter.

Only a few upper-case letters will require “an extra” line to start the new lower case letter at their base such as with B C D F H I O P S T V W  I  have drawn this line which will be the overlapping starting line as a dotted line.

Practice Joining Cursive Letters Sheets

  • Laminate the following Joining Cursive Upper-Case to lower-case practice pages or place each page in a plastic page protector.
  • Demonstrate and talk about where to start, how to form and end each letter.
  • Then ask your child to trace over the letters with a whiteboard marker.
  • Once your child knows where to start, how to form and end all the letters in lower- & upper-case, your child can start doing simple copywork as handwriting practice using the chart as a reference.

This download provides practice pages using every letter of the alphabet.  Extended lines provide space to not only trace over the letters but also to copy and write out the joined letters on the coloured lines provided.

I have also included a detailed explanation of letters’ line placement as well as coloured dots for starting and ending points for each letter in this download.

I will post a detailed blog post on letter line placement in my upcoming post.

Please pop over to my Packages page to purchase the updated Teaching Cursive Handwriting Step-by-Step booklet.

If you wish to write a private email to me, please fill in the contact form on my About & Contact page.  I would love to help you!

 Blessings, Nadene
  • Subscribe Click to receive all my new posts packed with practical tips, projects, plans, pages & art ideas by email
  • Facebook Follow Practical Pages on Facebook

Lapbook planning tips

My children loved doing lapbooks and  we quickly figured out some practical tips to prevent overwhelm and to maximise our studies with other activities.  Here are some of my tried-&-tested practical lapbook planning tips ~

Often when printing out and cutting out the lapbook minibooks for your new lapbook , you will have heaps of booklets, papers, cutouts which may cause you and your children to feel overwhelmed. 

Print out the table of contents or index with every download and file this with the lapbook instructions.  If your lapbook printout doesn’t have an index, draw up a list of each minibook theme, or the topics or chapters covered in each minibook of the lapbook study along with a short description of each activity.  You can download my free lapbook planner below.

Whether you download a lapbook or make one for yourself, it helps to print out the lapbook planner or index page so that you have a birds’ eye view of your core topics, sub-topics, minibooks, relevant websites, videos, songs, recipes, hands-on activities and any other downloads as well as the time you plan for each minibook or topic.  Here  is  the  index  I used for my planning my Ancient Egypt Lapbook.  (You  can freely download  the Ancient Egypt Lapbook)

Here is my Pearl Harbour lapbook organiser  which outlined additional websites and sources used:

For more complex subject such as World Wars, it helps to draw up basic vertical timeline and mark the dates for all the most important events.  This helps to follow the course of events chronologically as well as plan the lapbook layout.

We always pasted all the minibooks into the lapbook before we started so that we did not waste time searching through a packet of minibooks to find the relevant one for the day.  You can read all about this in my post Time-saving tips for doing lapbooks. I must add here that my children often pasted their minibooks where they felt it best fitted and not strictly according to the suggested layout and it never was a problem.

We duct-taped along the spine of the lapbook and punched holes in the duct tape so that they were on hand in our files or ring binders.  (Read how we assemble and duct tape our Aesop lapbooks here.)

We stored each child’s completed lapbooks together in a file folder as seen in the photo below.  (Read all about how we stored our lapbooks and notebook pages here.)

Here is my lapbook planner page  free download (available in .docs or  .pdf versions) to use for your planning ~ Lapbook Planner or Organiser (MS Word.docs) or  Lapbook Planner or Organiser (pdf)

My children loved doing hands-on activities so I always extended our planned lapbook time to provide a wide margin for the spontaneous learning activities or additional enrichment.

Please do not ever rush to finish anything!  Take your time and aim to include the “extra” additional studies and hands-on activities!  These will bring your lapbook study to life!

Blessings, Nadene