Sight Words booklets packed with ideas

Updating archives ~ Get your FREE Sight Words sampler Ebook and purchase a complete 30-page Sight Words Ebook

Teaching sight words is a very important and helpful tool to make reading easier for young students from pre-K to Grade 3.

Sight words = often also called high frequency sight words, are commonly used words that young children are encouraged to memorize as a whole by sight, so that they can automatically recognize these words in print without having to use any strategies to decode. (Definition – Wikipedia)

Sight words often cover almost half the reading material on a page.  By memorizing sight words, a child can quickly recognise and recall these words and does not need to decode or break up or sound out every letter of each word, thus simplifying his reading process.
What sight word lists to teach?

There are 3 main sight word lists ~

  1. Dolch Sight Words
  2. Fry’s 1000 Sight Words list using more modern words.
  3. Most frequently used words First 100-200 most commonly used words charts  or First 100 high frequency word lists

Whatever lists you choose to teach your child, you should introduce one or two words  each day, gradually adding new words while repeating and practicing the taught words until your child has learnt the entire list. Very quickly your child will build a wonderful, rich store of instantly recognized words which he can quickly read, thus building his reading ability.

How to teach sight words?

A general rule = Always say the whole word, then spell it out and then say it again, underlining the whole word with the first 2 fingers from left to right. 

There are several additional valuable techniques to teach sight words. You can view these lessons on http://www.sightwords.com/sight-words/lessons/

  1. See and Say
  2. Spell and read
  3. Arm Tap
  4. Air Writing 
  5. Table Writing
  6. Quick correction 

Download your FREE sampler  ~ Sight Words Sampler including the Dolche lists with words in sentences and the Dice & Spinner templates

Sight word games to play

The best way to practice is to have fun! Once the words have been taught, the child must practice those words daily.  Many of these games involve physical exercise which, in turn, strengthens core and fine motor muscles and reinforces directions and spatial awareness.  My complete 30-page Sight Words EBook has all the games, ideas, activities, templates and posters for you to have fun teaching and learning sight words with your children.

As in all teaching, you should customize your child’s lists to suit their levels of maturity and ability.  When they are ready, they will quickly learn new words and enjoy the learning process.

Click over to my Packages page to order the full 30-page Sight Words Ebook which includes ~

  • How to teach sight words lessons with detailed examples.
  • 18 Creative Spelling games (one or two players & physical activities
  • 24 Spelling ideas with unique activities &fun ideas
  • Dolch sight word lists with flashcards & words in sentences
  • Fry’s 100 Sight Words
  • 100 Frequently used sight word lists
  • Spinner and dice templates for games and activities
  • Board game and Bingo template
  • Links to websites and YouTube videos

Please support me by ordering this wonderful booklet on my Packages Page.

References ~ You will find lots of other lists, flashcards, games and downloads on the web ~

 Blessings, Nadene
  • Subscribe Click to receive all my new posts packed with practical tips, projects, plans, pages & art ideas by email
  • Facebook Follow Practical Pages on Facebook

Twice Exceptional

I came across the term “Twice Exceptional” while reading Gifted Voices.   I had to look up its meaning:

“Twice exceptional (or 2E students) are sometimes also referred to as double labelled, or having dual exceptionality. These are gifted students whose performance is impaired, or high potential is masked, by a specific learning disability, physical impairment, disorder, or condition. They may experience extreme difficulty in developing their giftedness into talent.”

When I studied Remedial Education, I quickly realized that many children with learning difficulties were often gifted.  Once I started teaching, I also recognized that many gifted children presented behavioural problems, often similar to those of children with learning difficulties, due to their boredom and frustration with the school system. They often struggled to fit in and seldom discovered their unique gifting and wonderful abilities.

Describing 2E children, TKI explains,

“Gifted students with disabilities are at-risk as their educational and social/emotional needs often go undetected. Educators often incorrectly believe twice-exceptional students are not putting in adequate effort within the classroom. They are often described as ‘lazy’ and ‘unmotivated’.  Hidden disabilities may prevent students with advanced cognitive abilities from achieving high academic results. 2E students perform inconsistently across the curriculum. The frustrations related to unidentified strengths and disabilities can result in behavioural and social/emotional issues.”

Because a child struggles with their uniqueness or outside-of-the-box, or have different social-emotional needs, they struggle  in the conventional school system.  Many parents face the dilemma  of whether to stick to the school system or to homeschool their gifted or twice-exceptional child.  My advice is that you look for a place where your child can thrive, grow, learn and “become” in the most supportive, loving environment, which is usually at home!

Homeschool parents can tailor-make their educational approach to work with their child’s strengths, while gently encouraging them to strengthen areas of weakness.  Because you work one-on-one with your child, you can immediately determine where and when your child is bored or struggles, and adjust your pace or approach.

You can seamlessly include motivation, opportunities, therapy and remedial activities as part of your homeschooling for children with illnesses, disabilities or disorders.  Most remedial therapy is presented as games, and often children enjoy these fun activities.  Therapy varies.  Most children initially require therapy regularly, but as they master skills, these activities can be moderated or stopped.  Some children perform better with a therapist, because they may resist or refuse at home, while most therapy requires regular “homework” or practice.  Whatever your approach, try avoid instilling in your child a sense of failure or disappointment, or that the child has, or worse still, is a problem.

Homeschooling your twice exceptional child helps you establish a steady routine which is important when dealing with complex problems or disabilities.  Parents can establish a  healthy or specific diet as well as good sleeping patterns, and these routines and practices are often very helpful in assisting a 2E child.

Most importantly, your homeschooled child is allowed to progress at his/ her own pace without feeling that he/she isn’t the same as the rest of the class.  Avoid comparisons at all costs, not even one child with another in your home.  Avoid labels.  No one wants to know that his/ her person is a medical/ behavioural disorder.  Speak of their condition in positives, “My daughter loves to move … to learn well.”

Try find a homeschool family or support group that you and your child can cope with and where you find grace and encouragement.  Having a “different” child can often make one feel isolated and insecure.  Support groups are very helpful to assist parents who often feel overwhelmed and discouraged.

My youngest daughter would probably have required remedial therapy when she was young, but my husband, in such wisdom, encouraged me to let her be and to encourage her to learn in her own time.  We patiently persevered and it has wonderfully paid off.  From a struggling emerging reader, she is now our bibliophile and most avid reader in our home!

It may not seem like it now, but you will see your child grow and develop into the most marvelous person that they were created to become.   Do not give up!

With all grace and blessings, Nadene

Slow learner Joys discovered

It is possible to experience joy when teaching a slow learner.  Let me encourage you and share my experience of how I discovered joy instead of anxiety.

If my youngest child had been in regular school, she would certainly have discovered that she took a lot longer than her peers to learn.  In those fragile years, I’m sure she would have been labeled a “slow learner”.   But instead, in the privacy and comfort of our home, she flourished at her own pace.

It came as a shock to discover that my very young child couldn’t remember nursery rhymes. Despite daily repetition, the words floated past her memory and she could only tell me the theme of the rhyme, but not the words themselves.  “Auditory memory issues?” my remedial-teacher brain whispered.  Then, I discovered quite by chance, that if she acted out the nursery rhyme she remembered it well. “Okay … she’s a kinesthetic learner.”

Learning the alphabet took much longer than with my other kids at her age.  Maths skip counting missed beats, and learning to read seemed to take forever.  She desperately wanted to read.  It was this inner drive that kept her working and working on her skills.   I must add that this is what is quickly lost in school systems!  Kids feel shame and fear and lose their love to learn.   They dread being exposed and hide or avoid reading in any form.

But safe at home, daily she would come to me with her little readers to read to/ with me.    I learnt to slow things down to the place where she flourished … partnered readingme whispering the words in her ear as she pointed and sounded out the words. This went on for ages. I just kept sitting with her on my lap reading with her for months and months and months.

And then, one day, she simply took off! And my emerging reader became an independent reader! We were both overjoyed!

20161006_162405My youngest daughter is now 14 years old and is an avid reader of adult classical books.  She has her own collection of classic books, preferably hard covers, that she scouts for at secondhand book stores, and she reads and re-reads these every moment she can.

If my hubby hadn’t kept me in check, I probably would have taken my child to a therapist to evaluate her and start some remedial program, but, instead, in faith, we simply followed her pace and allowed her to learn as she was ready.

Shawna writes in a recent post on Simple Homeschool “In celebration of the slow learner“,

“I think it is infinitely more important that our children feel confident in their ability to learn something, than in how long it may or may not take to actually learn it.  Speed has never been the goal. Mastery, progress, confidence – these are all things that take time, and that are worth the wait.”

May I urgently suggest that you homeschool your struggling slow learner.  Bring them home and save them the misery and shame of failure and labelling.  Do it now!  Don’t wait for the end of year or a term.  Homeschooling allows you to tailor-make their education experience.  Aim to relax.  Follow a gentle pace.  Don’t fret about “trying to catch up”.  I want to state this with absolute confidence — your child will learn when they are ready.

Secondly, if you feel the need to have your child evaluated, pray for and look for a remedial therapist with compassion, humour and patience.   Ask other parents how they and their children feel about the therapist before taking your child to their first session.  And in my experience, this is not a permanent situation.  Remedial therapy is a temporary help to overcome weaknesses.  As your child improves, she will not require therapy.   Don’t fall into the trap of doing hours of boring, dull, repetitive remedial exercises.  Don’t allow your child to feel like she has “a problem”.  Worse still, don’t allow them to feel that they are a burden.

Most importantly — pray.  The Lord showed me how precious and special my child was just as she is and not as I felt she should be.  I learnt to trust Him and follow His lead.  His joy and boundless love for her enabled me to love and nurture my child.

Mom, do not fret about your slow learner.  Do not weep.  This is your special gift … to learn to love uniquely.  To love without fixing.  To love without wanting to change someone. To love patiently, with hope.  Such love never fails.

Praying for you … for much grace, courage and strength!  Blesssings, Nadene

Save

Save

Save

Save

Save

Save

Practical Tip ~ Arrow Chart

This week’s practical tip ~

Arrows

I discovered this concept during my studies in remedial education when I was a student and used it regularly with all my classes during my teaching career.  Teaching and reinforcing directionality and spatial awareness, the arrow chart is a very effective exercise for children, helping in all subjects and activities.

  • Quick and fun, arrow chart drills last only a few minutes
  • Can be adapted for groups and one-on-one lessons
  • Used as a preparation before a formal lesson, arrow charts promote focus and attention
  • Excellent tool to help refocus a child after breaks
  • Wonderful for remedial skills which help improve a child’s handwriting, spelling and maths
  • Use bean bags and jumping for gross motor responses
  • Use just arm movements for seated drills
  • Apply verbal commands or replies “up/ down/ left/ right”  or compass directions “north/ south/ east/ west”

Read more in my posts ~

Here’s your free 4- page download: Arrow Chart with detailed explanations, examples and remedial activities and suggestions.

Hope this practical tip helps.

Blessings, Nadene

Save

Spelling Habit Training

Learning SpellingI usually teach spelling with lists; Ruth Beechick‘s high frequency word lists, thematic spelling, and/or a Schonell Spelling list (see my Book List).  But whether you follow a spelling book, program or list, your children need to learn their spelling using all these steps in order to reinforce their spelling mastery.

Younger children learn best using as many senses as possible, so encourage listening, seeing, and doing.  Say the word, then spell each letter aloud (auditory memory) while looking at the word and then visualizing the word with eyes closed (visual memory).  Write out the word, or use scrabble tiles (kinesthetic memory).  These activities form a combination that really helps learning.

Make it fun!  I often exaggerate silent letters or pronounce the word as it is spelt.  Play games with letter tiles.  We love to work with Bananagram tiles!

Always teach spelling in context.  The child must understand the word’s meaning.  Test spelling with the word in a sentence.  My middle schooler loves to create her own silly sentences with as many words in a sentence that still makes some sense.

Use a whiteboard and quickly erase any mistakes while learning or doing pre-tests.  Avoid any visual memory of any incorrect spelling.

Ask your child to write out mistakes for corrections.  Usually 3 to 5 times is enough to reinforce the correct spelling.  Do corrections as soon after the test as possible,

Finally, encourage an older child to make their own vocabulary lists of words they learn from their reading.  I love the scene in the movie “The Book Thief” where the basement walls become the child’s word list.Free Download

Here’s your free teaching spelling poster download ~ Learning Spelling

If you would like my posts automatically delivered to your reader or inbox, please click the  RSS Feed button or subscribe button.

Blessings,

K5 Review

About 6 weeks ago, we started our free trial of K5 Learning.  

Butterfly girl FT

My daughter loved to work on all the programs and especially enjoyed the creative activities.  She (recently turned-12-years old) said this,

“I enjoyed the options the program provided and the fun activities.  The lessons were very helpful and gave me a boost in Maths.”

Let me start from the beginning ~

Their initial assessment was excellent. The results were detailed and clear, and for the first time in our homeschooling career, I had an accurate breakdown in my child’s Maths and Reading skill levels and abilities.

My daughter loved the Maths Facts section – mental maths “designed to help kids develop instant recall of addition, subtraction, multiplication and division facts”. She worked positively to maintain high scores and loved to see her mastery results on the K5 Math Fact Matrix display. What impressed me was that the program constantly adapted to reinforce specific maths facts which she missed or took too long to recall.  

The Maths program has excellent explanations of new maths concepts with good, clear examples of the work, followed by the exercises.  Without too much fuss, K5 gave a quick sound effect to indicate success or mistake.  After the exercise series, my child was given time to play on an “arcade game” which gave her a few minutes of  fun as a refreshing break.

The Reading and comprehension was thorough and very comprehensive. I was impressed with the comprehension questions and the vocabulary extension.

We struggled with the Spelling program because there was no “teaching” or pre-learning component on the spelling lessons presented.  The program presented the vocabulary test and practice almost blind.  Despite trying to change the grade levels, we didn’t seem to find our level and so we did not enjoy the spelling program. 

My only regret was that we didn’t have reliable, speedy Internet service during our free trial period and so we missed several days each week of online learning.  But I highly recommend this program to any homeschooler!  It is excellent and very effective! From an educational perspective, it is outstanding and their methodology is excellent.  From a parent’s perspective it is very easy to use, log in to assess and keep in touch with the child’s progress.  For the child, it is simple to log in and work on his or her own.

K5 learning badge125x125

K5 Learning has a referral program, which pays participants $25 for each new subscriber that clicks over to K5, so my daughter and I will be very grateful if you click here to go start your free trial!

Blessings,

Free Trial K5 Learning

I seldom promote products and have never done reviews, but an invitation to try K5 Learning caught my attention.

Home

K5 Learning has an online reading and math program for kindergarten to grade 5 students. I’ve been given a 6 week free trial to test and write a review of their program. If you are a blogger, you may want to check out their open invitation to write an online learning review of their program.

After receiving this invitation, I popped over to check out their website and I was very impressed.  Their demo videos looked so inviting and their approach and methodology seemed excellent.

My initial thoughts were that my youngest is already in grade 5 & 6 and up in most her subjects and that this might not fit into our homeschool schedule, but their Math Facts heading caught my eye and I thought that this would be worth doing the free trial.  They explain ~

“Learn math facts online and say goodbye to counting fingers”

“Recalling math facts efficiently is critical because it allows a student to study more advanced math topics without being bogged down by simple calculations.”

So, I hope to use K5 Learning with my youngest and trust that she will both enjoy and learn a lot more than she does with my Mental Maths fun worksheets and Bananagram spelling games.

For more information please go to http://www.k5learning.com/.  I will be back with my honest review in 6 weeks time.

Blessings,

Amazing Arrows

Long ago, when I studied remedial education, I learnt about the arrow chart. This chart trains children in spacial awareness and directionality, and it is extremely effective. Arrow Chart

Free DownloadArrow Chart  (Updated September 2014)

Back in the day, as a grade 6 & 7 public school teacher, I conducted my own research using the arrow chart for 2 of my 3 English classes (I taught 3 homogeneous classes the same lessons).  Classes 1 and 2 performed a few random rows of arrow movements, then they sat and wrote their spelling test. The 3rd class simply entered the class, sat and wrote the same spelling test. I recorded their results on the back of my board. By the end of the month, the 3rd class was clearly lagging in every result. When they saw the results, they begged me to do the arrow exercises with them. Their improvement was instant and very encouraging. It takes just a few minutes. Homeschool2 It is fun! It is physical.  It’s effective. It is simple.  It is mentally stimulating.  It is amazing! These exercises are especially effective before maths classes, handwriting lessons, early reading sessions and before any test.  I found that these activities  help “center” the child, especially after a break, or after outdoors activities, when they need to settle down to concentrate on their books.  While it is fun and stimulating, it helps the child to focus on the next task at hand.  Children with attention deficit disorders especially benefit from these arrows activities in between lessons, or when they are distracted.

For quick sessions, especially for groups, call the children to stand up next to their chairs and use both arms to move quickly straight up/down/ left or right.  I turn the chart around a few times, then I hold it where the group can see it, and randomly point to a row.  I usually only do 2 to 3 rows in a session.

Ideally, the movement should be a large physical movement, especially where the child’s whole body changes position. Good movements should cross the body’s mid-line to stimulate the left and right sides of the brain:

DON’T speak.   Simply point.  This is a visual activity.  (But it can be easily made into an auditory message, if the parent calls out the direction and the child moves.)

How it works:

  1. Place the chart in view, orientated randomly. (Any side is on top.)
  2. Describe what action the child must do in the same direction of the arrow. (Suggested actions listed below.)
  3. Start on any row.  Start beginners on the shorter rows.  Always start from the left and go across to the right.  Once the child gains confidence, start some rows from the top and work down to the bottom of the row.  ( I almost never work right to left, or bottom to top.)
  4. When working one-on-one with a child, the parent/ teacher can simply point along the row.  Once the child gains confidence, simply point to the starting arrow in a row and the child progresses along the row at their own pace, performing quick, clear movements.
  5. When working with a group, the teacher/ parent must tap each arrow with a pointer. The children must be trained to execute the movement instantly, quickly and then stand ready for the next tap on the following arrow.
  6. Once a row is complete, point to the next random row.  I often turn the chart around so that the child does not anticipate the direction or row to follow.

Suggested movements: You will need: a foam square or a small pillow, about 6 bean bags, a small plastic chair, an inflatable beach ball & a hula hoop.  Use your mini trampoline too, if you have one! 

  • Stand in a clear space and quickly stretch both arms straight up/ down/ left or right.  When stretching arms left or right, the one arm will stretch cross the body.
  • Stand on a foam square and jump off the square and immediately back into the square ready for the next arrow – jump in front/ behind/ left/ right.
  • Stand in a hula hoop on the ground and turn and lean down and touch the ground with both hands & immediately stand up – touch in front/ behind/ left/ right. (They could also jump out of the hoop, and back in, instead of touching the ground with both hands.)
  • Place a small plastic chair in a clear space and the child must sit ready to move.  They jump up, take a few quick steps to the front/ back/left or right of the chair and then quickly sit down again.
  • On a mini trampoline mark the center with a small masking tape cross and place a small arrow pointing in all 4 directions on the rim of the trampoline. The child stands in the center, on the cross, and jumps forward/ back/ left or right according to the arrow chart and immediately back to the center cross.
  • Sit on a pillow or foam square on the ground and hold a box of bean bags in their lap. The child must take the bean bag in the right hand and place it in front/ behind/ left or right on the ground next to the pillow.  They can alternate doing a row using the left hand and then a row using the right hand.

Homeschool

Throwing and catching is fun too!

  • The child has the bean bags and throws them in front/ behind/ left or right of a target like a foam square/ a hula hoop/ a bucket.
  • Draw a large square with chalk on a wall.  The child holds an inflatable beach ball and throws it to the position up/ down/ left or right of the square on the wall.  The ball will bounce back and the child needs to catch it again.  (I place the chart on the wall near the chalk square and point to the arrows in the row.)
  • A partner/ parent or sibling stands in front of the standing child. Place the arrow chart on the ground in front of the child.  The parent tosses one bean bag to the child who catches it and tosses it to the front/ back/ left/ right of his feet.  He then quickly stands ready to catch and toss the bean bag for the next arrow. When the row is complete, he picks up each bean bag and tosses it back to the parent.

My youngest child, now 12-years, still LOVES these quick, fun sessions!  Not only is her concentration more focused after a few arrow drills, but all her skills show a marked improvement too.  Her handwriting speed and control is noticeably better too!

I highly recommend these amazing arrows.

Feel free to ask questions and share your experiences with this arrow chart with other readers in the comments below.

All in grace,

Learning Phonics the ABACARD® Way!

When I started homeschooling over 12 years ago, I used ABACARD® to teach phonics and early reading.

This system, created by © Shirley Epstein and other teachers and artists,  have designed picture clues within each letter shape.  This concept assists memory of the shape and sound of each letter.

“It works because the clue is contained in  the letter shape!”

When my young children showed signs of reading readiness, I put the wall chart on the wall near their beds.

I simply pointed to and read each letter in its phonic sound and named the picture inside it, such as: “a is for apple“, “b is for ball”  and “c is for colours” (using the phonic sound for each letter and not  “ay/ bee/see…”    Then they repeated the sounds and named the picture clue inside each letter.

Each day I revised the previous letters and continued with the next set.  Within 3 days or so, we had covered the alphabet.  At each bedtime and nap-time, we would run through the chart.

I was delighted to hear my young 4-year-old reading the chart aloud on her own to herself as she lay down for her midday nap after just a few days!

Then I took out our ABACARD® cards.

They come in a nifty hanging plastic holder with clear plastic pockets containing packs of 4 of each letter.  My kids loved the colourful jellytot sweets design on the back of these cards.

We revised the letters and then played games several fun games like “snap”, “memory” and “twin and win”.  The pack comes with a lovely instruction booklet.

Then we started building words with the cards. Taking just the letters p, t, b, g, and the vowels a, e, i, o and u we made the word bag. We swapped a and made beg, then big and bog and bug. Using this principle we made up lots of words – my child WAS READING!

When we moved on to early readers, we used these cards to make up the new vocabulary and played games until these new words were easy to read.

ABACARD® is an excellent tool for remedial work too.  Because each letter has a picture inside it, children are less likely to confuse letters!  It is great for kinesthetic learners because they can handle and move each letter.

Abacard are still busy creating their new website, but they can be contacted at Abacard@telkomsa.net or call them on South Africa 0861 67 22 22 or 083 463 7355

Please note:  I do not distribute, sell or receive any payment for endorsing their product.  

Blessings, Nadene

Is it b or d? New Posters for b/d Reversal

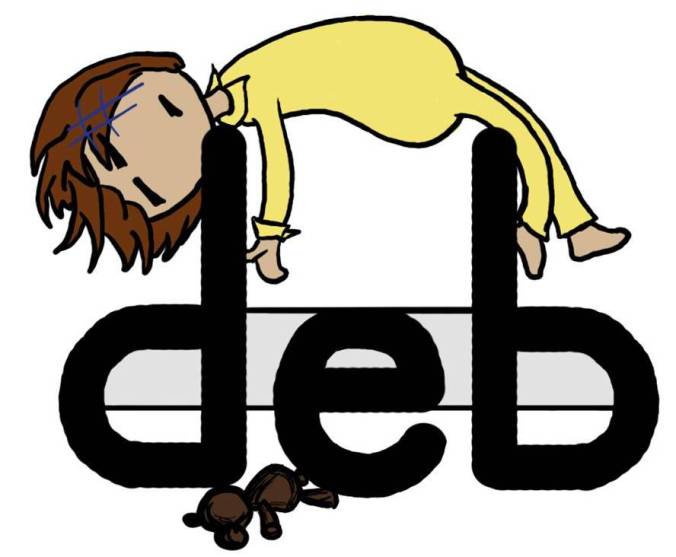
Aren’t these posters gorgeous?

They so clearly show the difference between b and d.

Here is your free download ~ bed or deb posters

Mari Saaiman created these lovely graphics.

You can see my other posts with Games for b/d reversal and letter confusion and some gentle encouragement when there are problems.

Blessings,