Narration shows what your child knows

A new homeschool parent recently asked on Facebook,

How do you know what your child knows?

Charlotte Mason has a very simple method  that reveals what a child knows = narrations.

So how do you start with narrations?

Toddlers naturally retell their stories and nursery rhymes with accurate details.  Think of how they easily tell dad about their latest story or what they saw on their nature walk.  This is a narration.  Oral narrations are natural and, when practiced, form the basis for written narrations.
How then do you develop oral telling-back to written narrations?

Most young children find writing challenging and difficult.  Transition to dictated narrations where Mom writes or types out word-for-word what the child tells.  You act as their scribe.  Young children can illustrate a narration instead of “telling back”.   By and by, your preschooler will have a wonderful collection of dictated narrations in their own notebook.

Develop dictated narrations by writing out their narration using a light pencil, and ask your child to carefully trace over their narration.  Copywork is slow and difficult for children new to writing. Often they will grow weary after tracing over a few lines.  But, gradually, they can neatly copy their narration.

Older children enjoy typing on the computer as the spell check can highlight errors and they can type quicker than handwriting with a neat printout.

Use notebook pages ~

Little House Booklet notebook pages

These are printed pages with lines to assist young children space their handwriting.  Some notebook pages are decorated with borders, clip-art, headings and place for illustrations.  These pages give an incentive to write as the page provides some inspiration.  Young children find that the few sentences they write will quickly ‘fill up’ the lined area and they are less daunted by this than a large blank page.  Studies show that color and illustrations help with memory recall and the clip-art and photos or other visual layout on notebook pages assist them in remembering the information.

Pop over to download my free notebook and copywork pages.

Narrations inspire and expand a child’s vocabulary and instill good grammar without formal lessons. Narrations are far easier activities than fill-in-blanks lessons in workbooks, or memorizing facts from textbooks, or writing out tedious, long notes.  No more boring lessons!

Narrations are unique to each child.  Narrations reveal what each child personally connected with and remembered, and then expressed in their own style and individual character, while still remaining true to the original.

So using Charlotte Mason’s approach, your children will soon deliver the most accurate, detailed oral narrations.  Young children will tell back their story with interesting detail and imitation.  Their vocabulary and writing skills will naturally develop, and as they mature, your children will eventually fill their notebook pages revealing their amazing knowledge, writing skill and creativity.  Just take it slowly, encouraging your child to grow their skills.

With narrations you will easily know what your child knows!

Blessings, Nadene

  • Subscribe Click to receive all my new posts packed with practical tips, projects, plans, pages & art ideas by email
  • Facebook Follow Practical Pages on Facebook

Textmapping

I came across Textmapping several times this year

Home

and decided to try it out as another part of teaching my middle-schooler’s how to

highlight keywords and use word banks and write her own notes from a text.

Text-mapping is an excellent technique that gives the child an overview of all the text, introduces pre-reading skills, and helps the child differentiate the text.

Basically, your child marks the textbook chapter or relevant pages which have been stuck together to form one long scroll, using highlighters to mark the scroll; they circle, underline or draw boxes around sections, headings, text, illustrations, dates and important vocabulary.

Drawing of a scroll that has been marked with highlighters and colored markers. Shows margin notes and certain key features circled, colored and otherwise marked.
  • The complete layout of a scroll gives the child an immediate overview ~ great for global learners.
  • Because of its length, the child must move along it, zoom in or out, to interact with the text ~ excellent for kinesthetic learners.
  • Marking is very physical and hands-on ~ wonderful for the tactile learner.
  • The colored markings  are very clear and everything can be seen at a glance ~ fabulous for the visual learner.
  • Scrolls and text mapping provide a better fit with the learning strengths of LD and ADD individuals ~ helps children who have learning disabilities or attention deficits.

So how did we do it?

Although I worried about the cost, I color-copied the relevant pages from our textbook and we taped them together.  I wasn’t sorry.  The colored pictures helped Miss.L “read” much of the information.  (And we used some of these illustrations in her notebook pages.)

Miss.L10 started out with a general overview and pointed out all the illustrations, pictures and main headings.

With that done, she took her highlighters and started marking out the text.

Working on the floor, which she enjoyed much more than sitting at the table, she circled the main headings in green.

Then she outlined the illustrations, photos and drawings with grey.

Next she marked the sub-headings and supporting texts with blue.

Then she  used pink and highlighted all the dates.

Finally highlighted some important key words with yellow.

It took just a few minutes.

She hopped up to get a “bird’s-eye view”.

(The book we used here is called “All About South Africa“.  It is a comprehensive reference book with loads of pictures, photographs and pages filled with interesting text. It is an excellent ‘go-to’ book for our South African curriculum “Footprints On Our Land” and the reference book covers history, geography, natural sciences, famous people, important places, trade, industries … the works!)

Did it work?

Yes!

  • She could quickly find the section “Difficulties of Pioneering
  • She was able to focus on the marked area and was not distracted by anything outside the blue circled area.
  • Using a yellow highlighter she underlined the important facts in each sentence.
  • We folded up the scroll so that just her relevant page faced out and went to the table to write her notes.
  • With no fuss, she used the highlighted words, changing the word order and wrote out lovely, clear sentences!
  • She cut out and pasted the illustration on her notebooking page and was done!

I was stunned. The results were impressive!

It was fun, different, easy, simple, relevant and enjoyable!

I will definitely use this technique for the remaining section of history.

Here are my notes from the official Textmapping.org site.~ Text Mapping (my notes focus on the benefits of textmapping, and the colors used for marking non-fiction as well as fiction texts)

(As you can see in this post, this method is not the same as Mind mapping.)

Have you used Textmapping?  Please share your experiences with the readers in the comments.

Blessings,

Highlight Main Ideas

My middle-schooler is learning to write her own notes.

From simple oral narrations, where she “retells” the details of something I read to her,

she now must read her own notes

highlight the main ideas

use those key words or phrases

in her own sentences.

Tough stuff for a 10-year-old!

So we start with baby steps:

I break it down into skills she can manage and build it from there. 🙂

Using the Table of Contents to find the relevant information

  1. Read the notes together.  I sometimes just whisper the words near her ear as I do in partnered reading.
    (Some children need to “see the big picture” first, so a good read through helps them understand the basic flow of ideas.  But if your child is chomping at the bit, and raring to get to work, start straight away with the next point.)
  2. Highlight the main ideas in each sentence.  It may be just 1 word, or a phrase, or a word here and there.
    Again, help your child with this vital skill.  Do it together.  Sometimes I try “trick” my child with a silly concept and say, “Do your think this … is important?”  She’ll giggle, look carefully and chose a more important word.
  3. Use these key words in their own sentences.  Start this skill orally.  Encourage your child to read the highlighted words from 1 sentence aloud and then put them together into a new, simple sentence, similar to the original sentence.  Perhaps change the word order around.  Start with a highlighted word and let your child finish the sentence.  This way, they learn how convey the original concepts, but use their own words.  A vital skill!  Instruct them at the very beginning that they should not copy the original text.

    Write simple sentences using the highlighted words

  4. Write down the ideas.  Again, I encourage you to “help” your emerging writer.  Perhaps you could write the first sentence down as your child dictates to you.  Make them feel important and say, “Tell me what you want to say.”  You could write it directly on their page and then work is done.  Then, the next time, write their dictated sentence out on a white board and ask you child to neatly copy it in their notebook or lapbook page.  Finally, ask  them to write the sentences on their own after an oral practice.

Writing sentences in a minibook

It takes a few stages, but soon your child will master several important skills!

It will happen.

Your child will learn to write their own notes.

How have you helped your child find key words, identify important facts or re-write these facts on their own? Please share with us in the comments.

For your information: In these photos, my child is completing a Footprints in our Land “The Dutch at the Cape” lapbook – of part a wonderful South African literature-based history curriculum.

Blessings,

Narrations 103 Puppets

This is number 3 in my series of Narration posts. (Read the previous posts Jot & Draw and Type & Print)

Many young children love to tell their narrations!

What better way to dynamically retell the story than with

Puppets!

Some of our best puppet shows were spontaneous –

Finger Puppets

The children simply drew outline pictures of the characters from the story.

They stuck a strip of paper to the back of the picture,

wound the paper strip around the finger and taped it closed,

and narrated the story.

Children with a flair for the dramatic include accents and actions.

They swap finger puppets to narrate different characters.

Folded flat, the children pasted their finger puppets on their notebook pages.

Paper Puppets

Our free Aesop lapbook came with paper puppets.

My youngest enjoyed hours of free play with her puppets.

P1070759

Paper Doll/ Men Puppets

During our Sonlight World History studies we created our paper doll series.

These paper dolls were fun to use in narrations.

Laminated and stiff, the children played out their narrations and stories.

But you could paste the paper doll on a wooden stick and make “proper” puppets!

They provide hours of creativity – coloring in, cutting out, pasting clothing and narrating.

We store ours in clear plastic zipper bags.

Hand Puppets

Our hand puppets have been enormously popular

and have lasted for years!

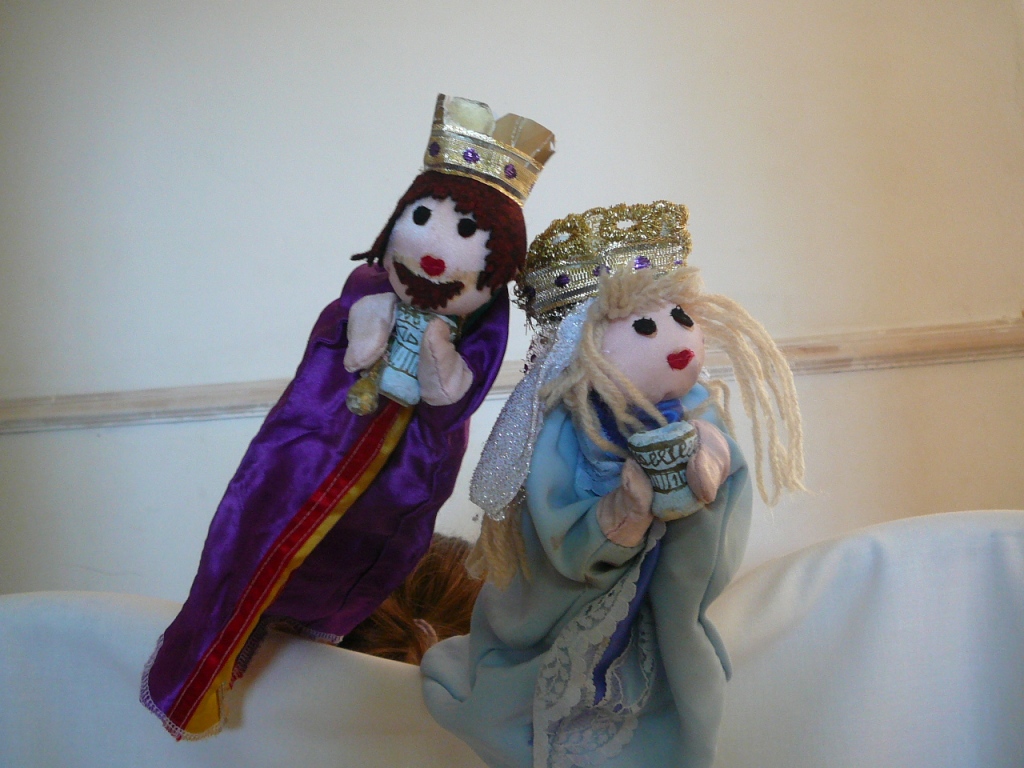
We made our fist puppet show

Esther Play for Purim

with puppets, backdrops,
props and a full script of Esther .

A few years later we updated our puppets,

made new backdrops,

added some animal puppets on sticks

for our new play ~

Nativity Puppet Play

Whether simple and quick,

planned and prepared,

practised or spontaneous,

puppets take centre stage.

They divert attention away from the child

and give the child something to “do” while narrating.

Allow your child the freedom to express their narration in a way that is not always dictated or written.

Try puppets!

Blessings, Nadene
Narrations 102 Type & Print

In my previous post I shared some practical ways to be your child’s narration scribe.

In this post I would like to give some tips on typing and printing out your child’s narrations.

Just Type it ~

  • Sit at the computer, open a new Word page and start to type as they narrate.
  • As. Is.
  • Your aim to capture your child’s flow of thought.
  • Don’t worry about any technicalities … yet.
  • Resist the temptation to correct/ prompt/ re-word anything.
  • Don’t worry about mistakes. (I almost never talk about grammar or language use while doing narrations.)
  • If the child stalls or is taking too long to start, you could ask a simple question, “What is the most exciting part?” or “How did …?” or “If you look at the illustration tell me about the story …”
  • Paragraph where necessary.
  • When they have finished, add their story title, and under that, their name and the date.
  • Read it back.  If you read it as they dictated.  If there is some issue such as each. and. every sentence starting, “And then …” “And then …” they will pick up the repetition and you can encourage them to leave out the “And then …” and start the sentence directly.
  • Ask them if they would like to add, or change, or remove anything.
  • If they are happy, save it.
  • Done.

Now for some computer stuff ~

  • Once the narration is ‘captured’ save it.  Create a folder for each child with their name.  Add sub-folders for specific subjects in their folder, (e.g.: Nadene — History)
  • Select the page layout ~ Portrait (standing up tall and narrow) or landscape (lying wide and flat)
  • Enlarge the title and underline or bold it.
  • Let them choose an interesting or suitable font and font color.
  • Enlarge the font to about 26 (large) so that they can “read” their own narration once it is printed.  Most young children merely ‘retell’ their original story, but this becomes an excellent early reading exercise!
  • Insert photos, clipart or images into the narration where necessary.
  • If the story is long enough, add page numbers.
  • Print out the page.  Punch holes and put it in a binder or cut it out and paste it in their jotter, or on the notebook page, or above or below their illustration.

Print the story out as a A5 booklet~

  • Save the story.
  • Now you will need to make a few layout changes to create a booklet:
    • Select suitable sections (usually after each paragraph) and click ‘insert’ – select ‘page breaks‘ to separate the writing on to a new page. Now there will be a large blank space under the sentence/ paragraph for the child’s illustrations. I try to have an even number of pages, but this is not necessary.
    • ‘Insert -page number’ – select ‘page number‘ and choose if you want the number at the top or bottom of the page, left, right or in the middle of each page.
    • Select all and change to a large font size (about 22 – 26) because you will print 2 pages on a page and it will ‘shrink’ the writing
    • Save the new layout.

Now to print ~

  • Select ‘print’ and on the print page menu look for ‘print 1 page per sheet’ and change it to ‘print 2 pages per sheet‘.
  • See how it looks on the ‘print preview’.
  • Make sure that the font is large enough.  If it is too small, cancel the print job and go back and select all and increase the font size.
  • If you are satisfied – print it out.
  • Fold the pages in half or cut them out to make a booklet. Staple.
  • Let the child illustrate on the blank pages/ spaces.
  • Ask the child to make and/or decorate a cover.

My children loved their own story books and proudly showed and ‘read’ their stories to family and friends!

How have you printed and saved your children’s narrations? Share with us in the comments.

Blessings, Nadene

Narrations 101 Jot & Draw

Narrations are an important principle in a Charlotte Mason education.

I have found that a young child naturally “retells” a good story.

Even a 4-year-old narrates with detail and passion!

All you need to do is find ways of capturing their thoughts.

Here are some practical ways you can collect your child’s narrations ~

Use a blank jotter or notebook ~


  • Buy the cheapest newsprint jotter books and cover it with the child’s own art.
  • Paste everything they draw, scribble and copy into this jotter.
  • You may fill several in a year!
  • Write out the story in pencil as they narrate and let them copy over your writing.
  • Draw the title really big and bold and let the child draw a picture under it.

Create a narration notebook for the story/ subject ~

  • Use blank or colored pages.
  • Tea-stain paper and crumple the paper to make it look “old”.
  • Tear or burn the edges for an aged effect.
  • Join a few pages length-wise and roll it up to become a scroll.
  • Re-purpose old telephone books or pages and paint over the printing
  • Staple the pages together at the top/ side with a cardboard cover.
  • Be creative and make a booklet with stick and rubber band – see how to at Susan’s Making Books.com
  • Punch holes and put into a binder/ file.

Draw a picture of the story ~

  • Ask your child to draw while you read aloud.
  • Let them copy the book’s illustrations.  This is a good way of teaching the child to draw.  Some children’s books are so beautifully illustrated that they inspire a child!
  • Add the story title & a date.
  • Write their narration around/under/ next to the picture as they dictate.  Simple narration!
  • Make a collage. Add details found in magazines to a picture.
  • Find clip art or Google pictures or images on the computer and let your child add this to their narration page
  • Make a comic strip – divide the page into 4-6 blocks.  Number the blocks.  This is good practice to sequence the story.

comic strip page

  • Add educational value to the drawing – (if they will allow)
    • punch holes around the edges and let them practise threading/ sewing around the page with wool
    • draw vertical and horizontal squiggly lines through the picture and let them cut on the lines
    • now let the child make their “puzzle” picture up again and paste it in the jotter
    • cut out the main characters and let the child glue them on a colored or painted background.

Read my original post on this topic ~ Mom ~ The Narration Scribe.

Join me in Narration 102 where I share how to type and print your child’s narrations as a booklet.

How do you encourage your young children to record their narrations? Feel free to share in the comments.

Blessings,

Water Cycle Wonders

Another fun, yet educational hands-on activity we did recently was

a water cycle

Taking our cue from references we read about in our living history book, we looked at how rain forms and falls to form rivers and flow into the sea.

We made our own “rain~

Here’s how ~

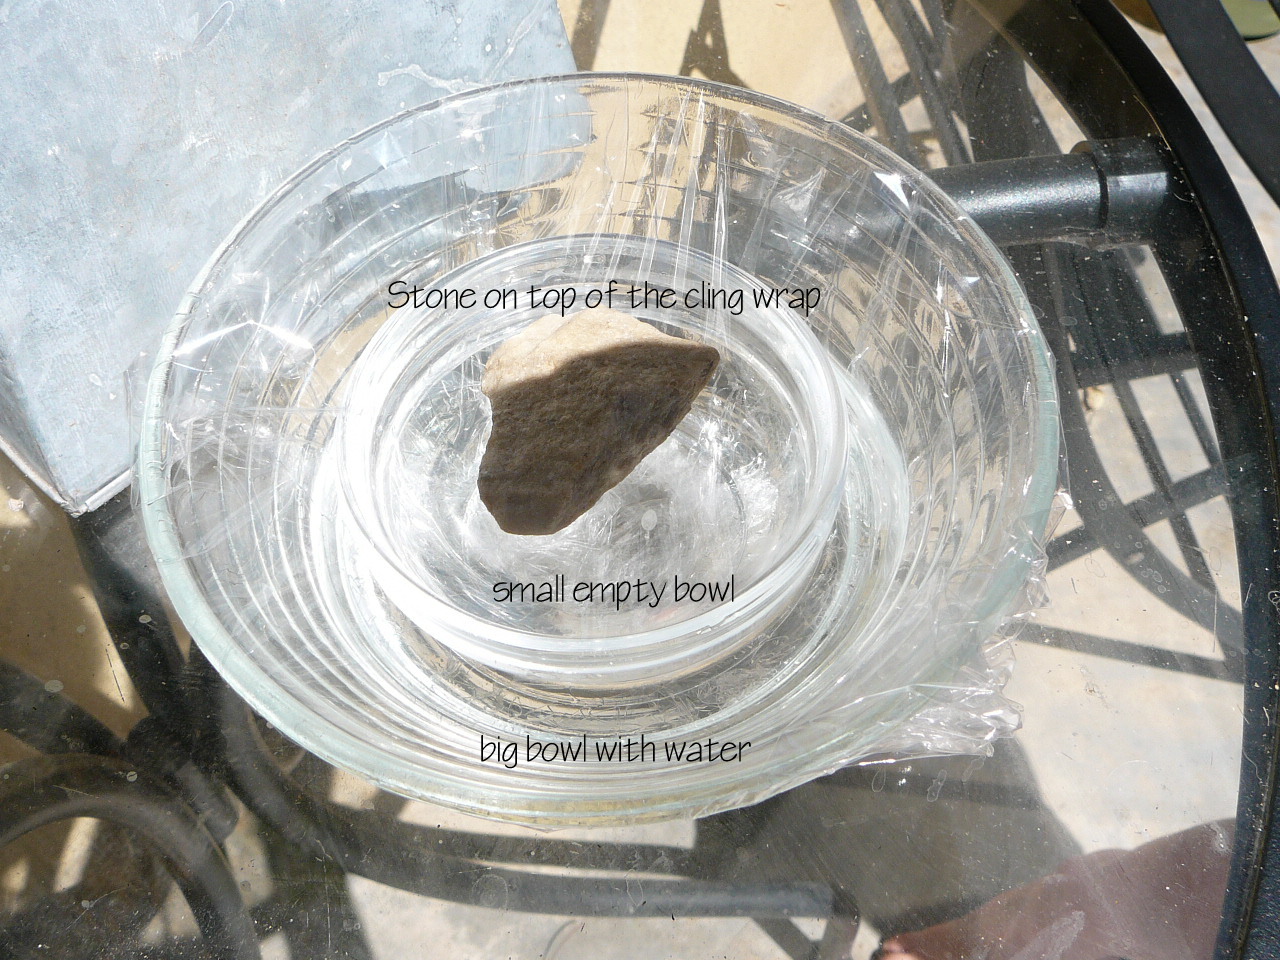
  1. Take a large glass bowl and pour some water in it.
  2. Place an empty smaller glass bowl inside the big bowl.
  3. Cover the bowls with plastic cling wrap.
  4. Place a pebble in the center so that the cling wrap dips down slightly.
  5. Place the bowls in the sunshine and leave for several hours.
  6. Observe the water condense and form droplet on the inside of the plastic cling wrap.
  7. When large enough, the droplets fall into the smaller bowl = rain!

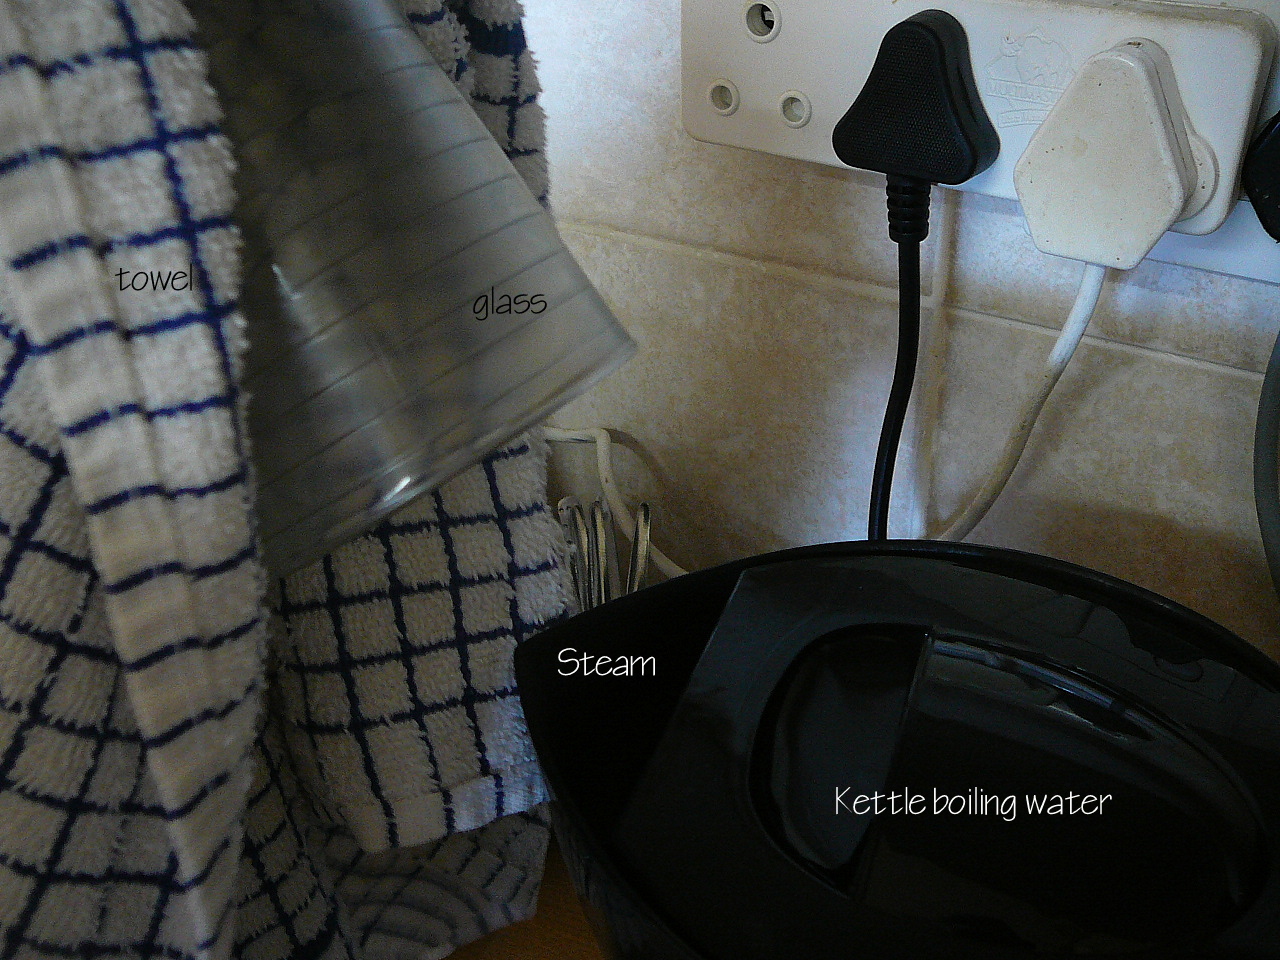
A fast demonstration of how water vapor condenses ~

  1. Hold a glass with a towel carefully over steam coming out of a boiling kettle spout.
  2. Observe water droplets forming inside the glass.  These droplets join and drip down and out off the glass.
  3. Parental note: Steam burns and this must be done by an adult or with careful supervision.

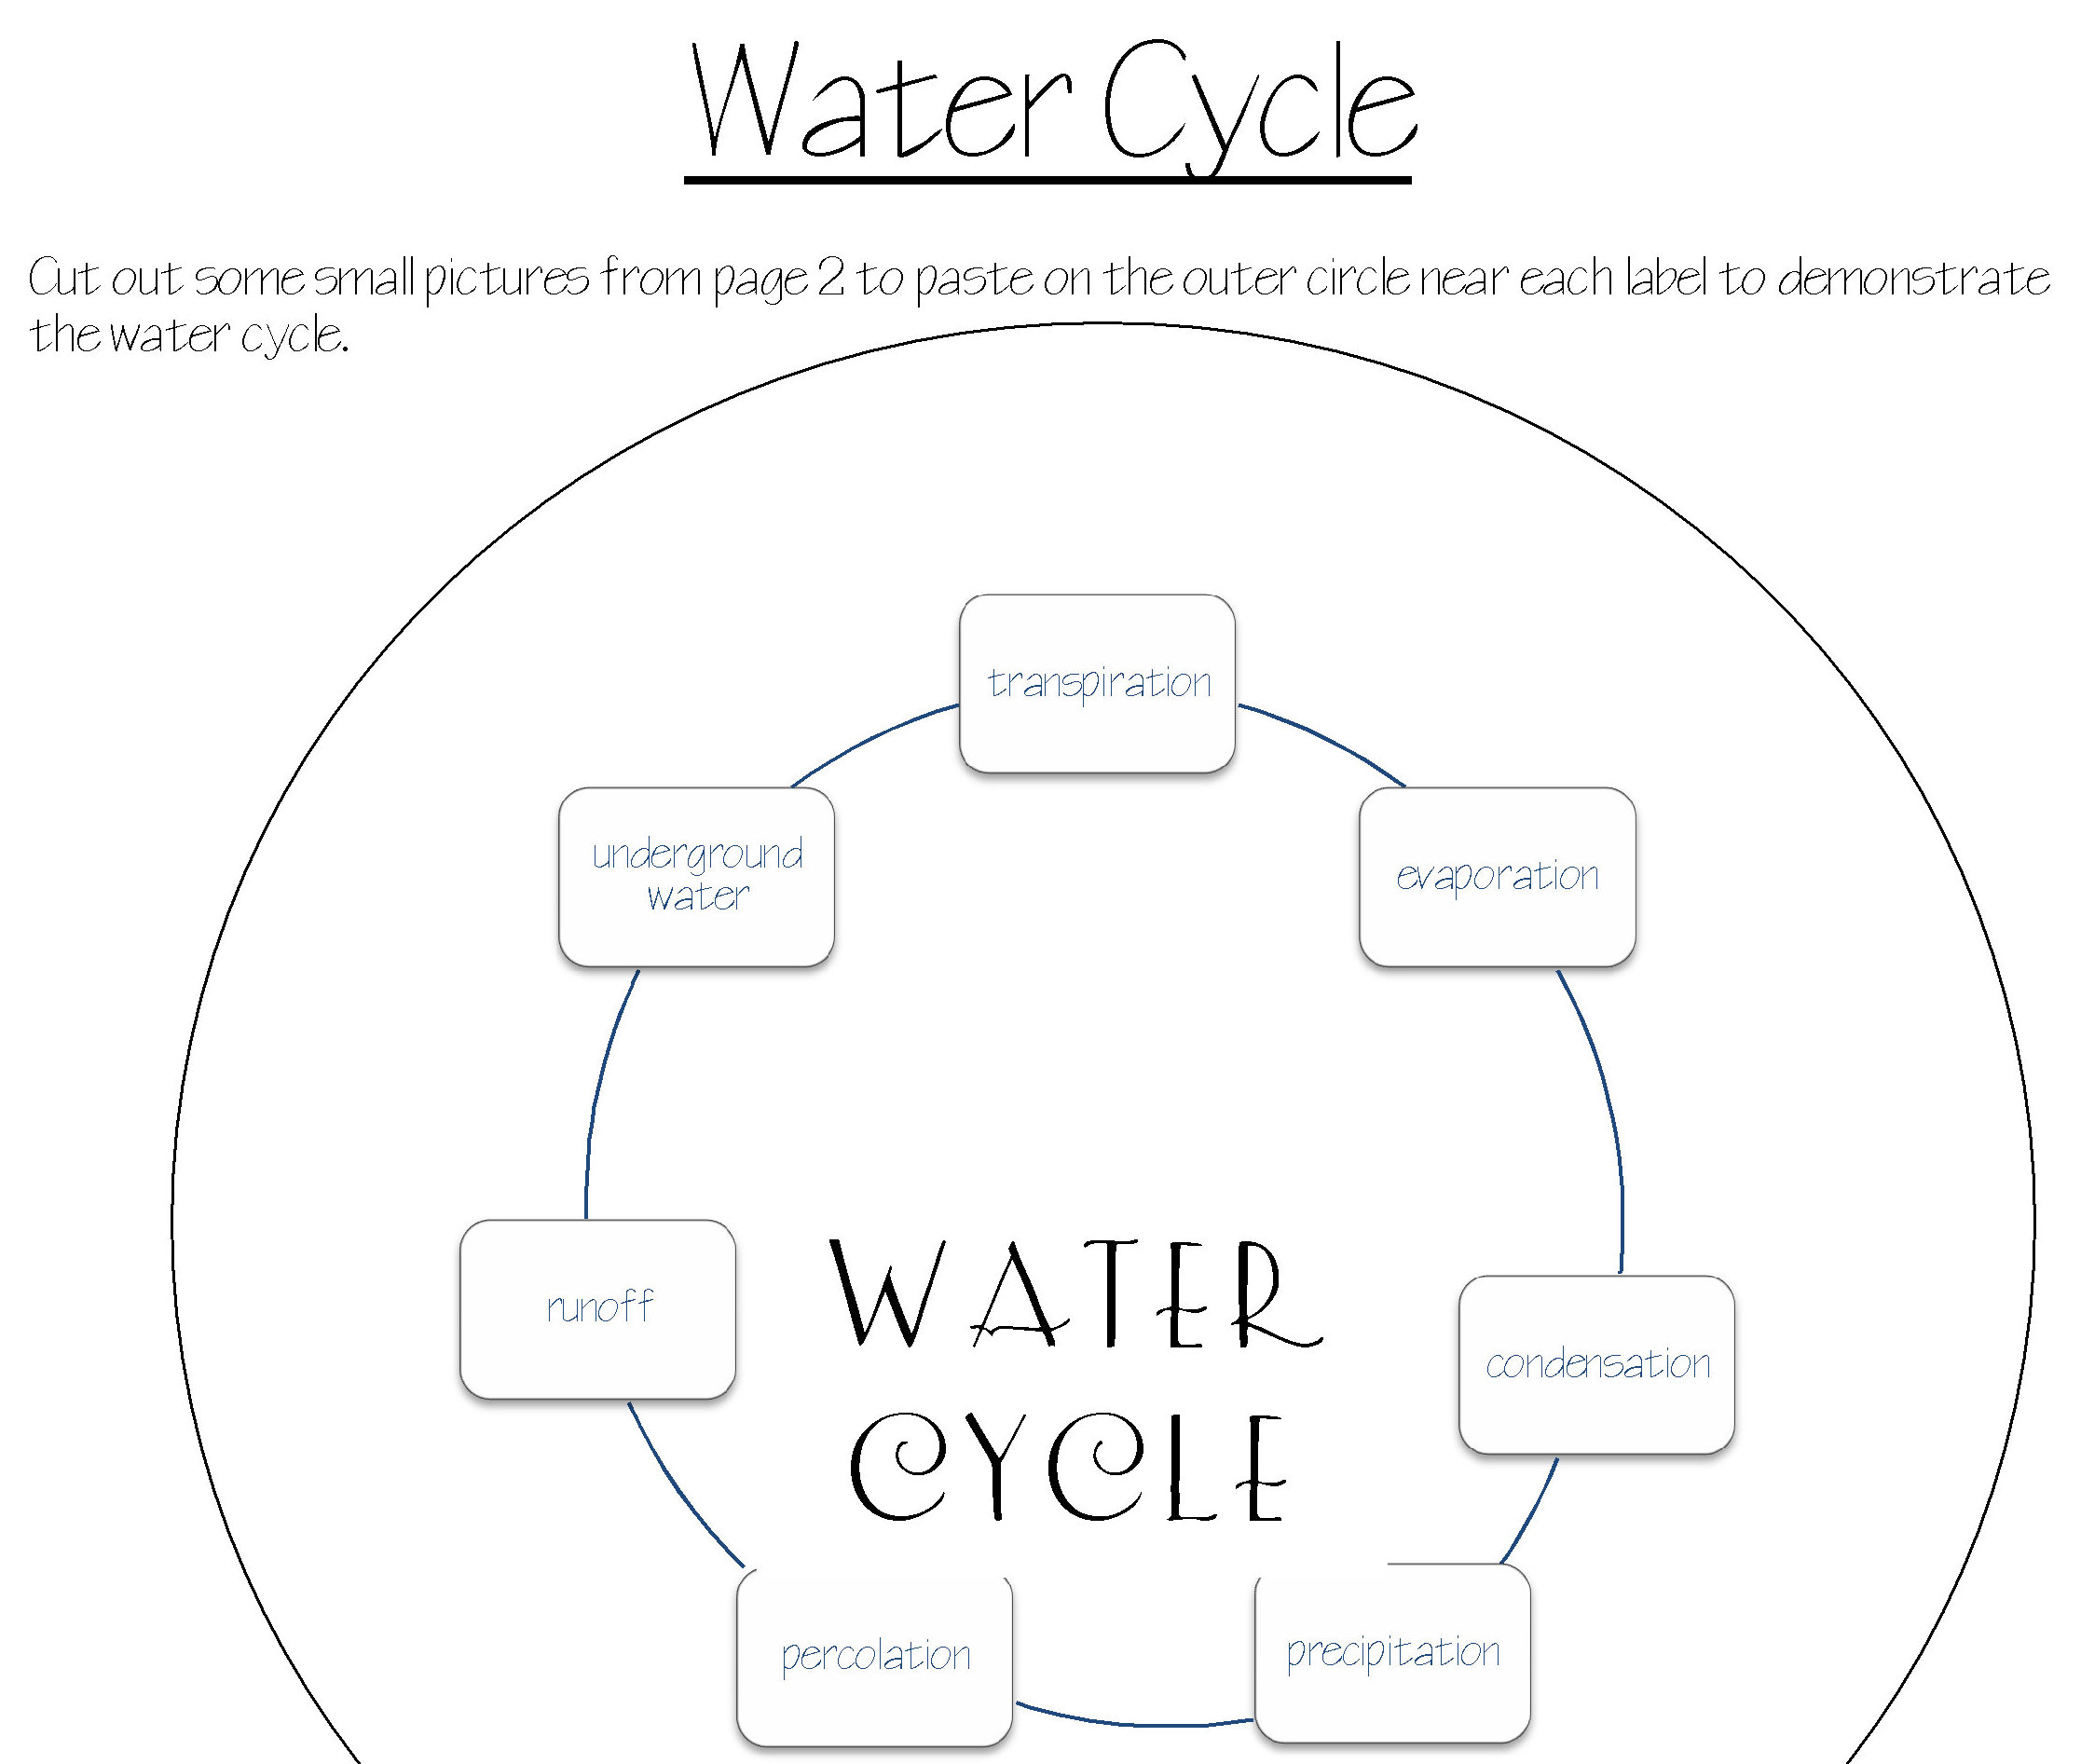
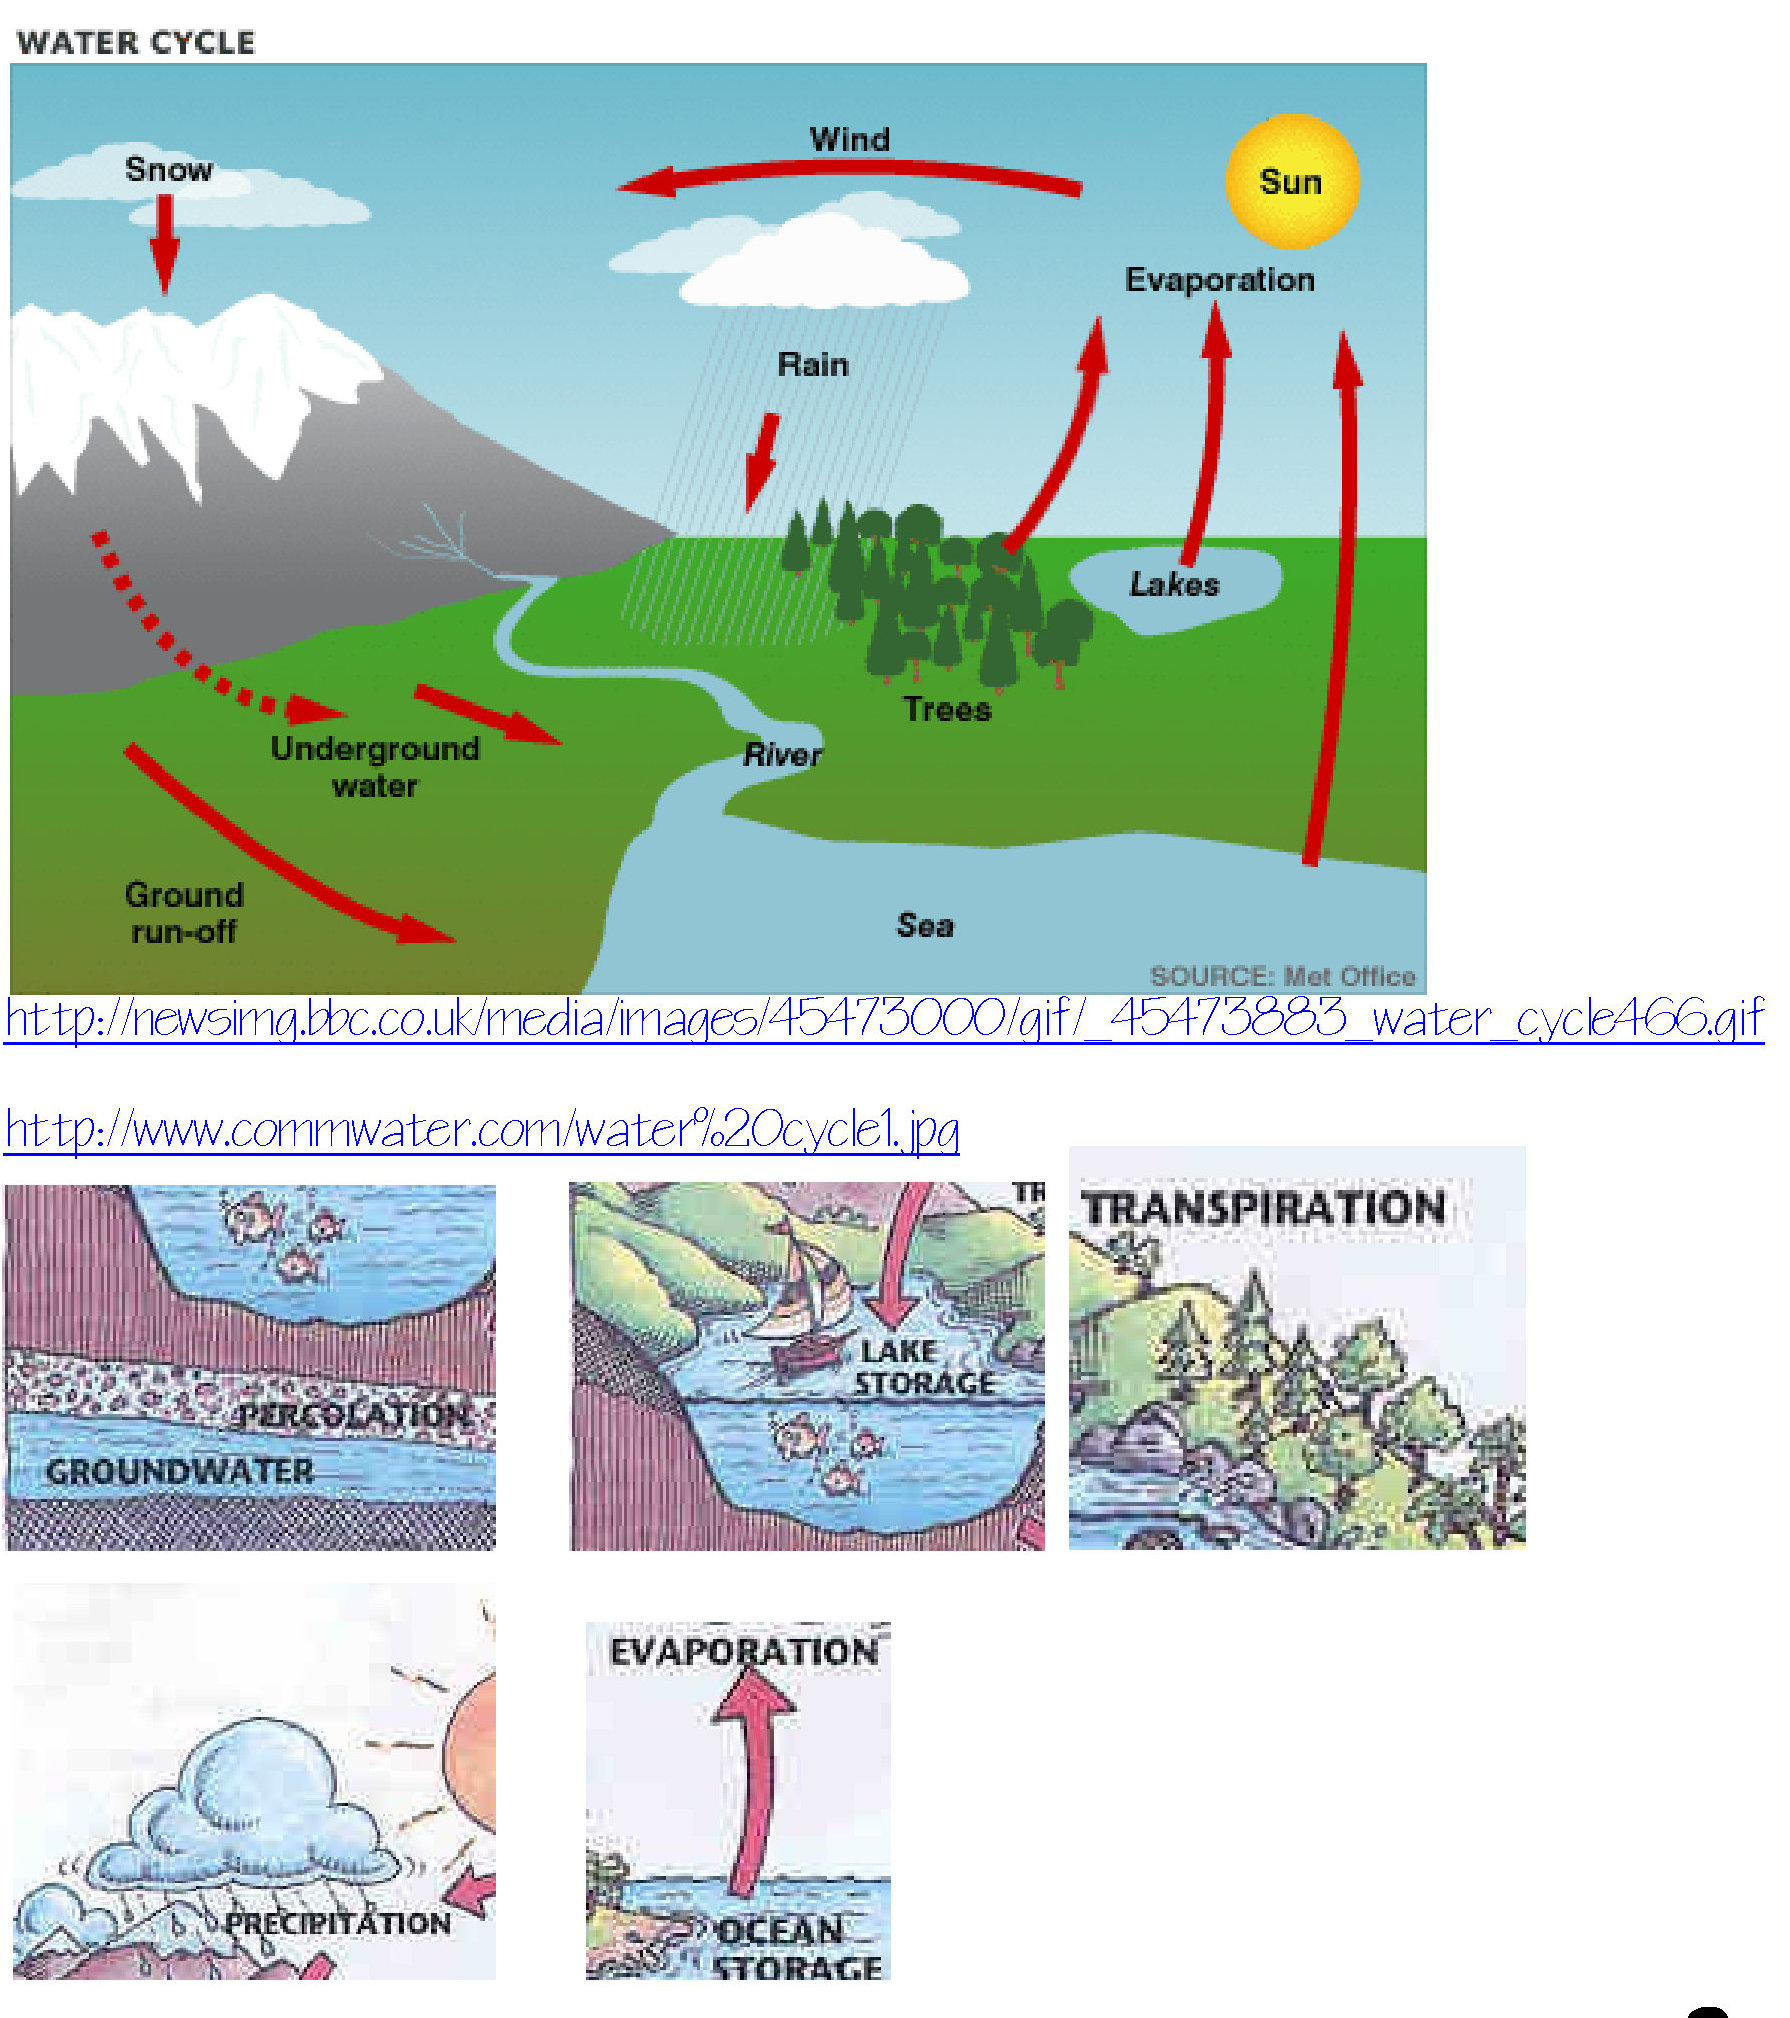
I created water cycle notebook pages with:

  • clear labeled diagram of the water cycle
  • circle table with labels and some pictures to cut and match

Here’s your free download~

Water Cycle Notebook Pages

Blessings,

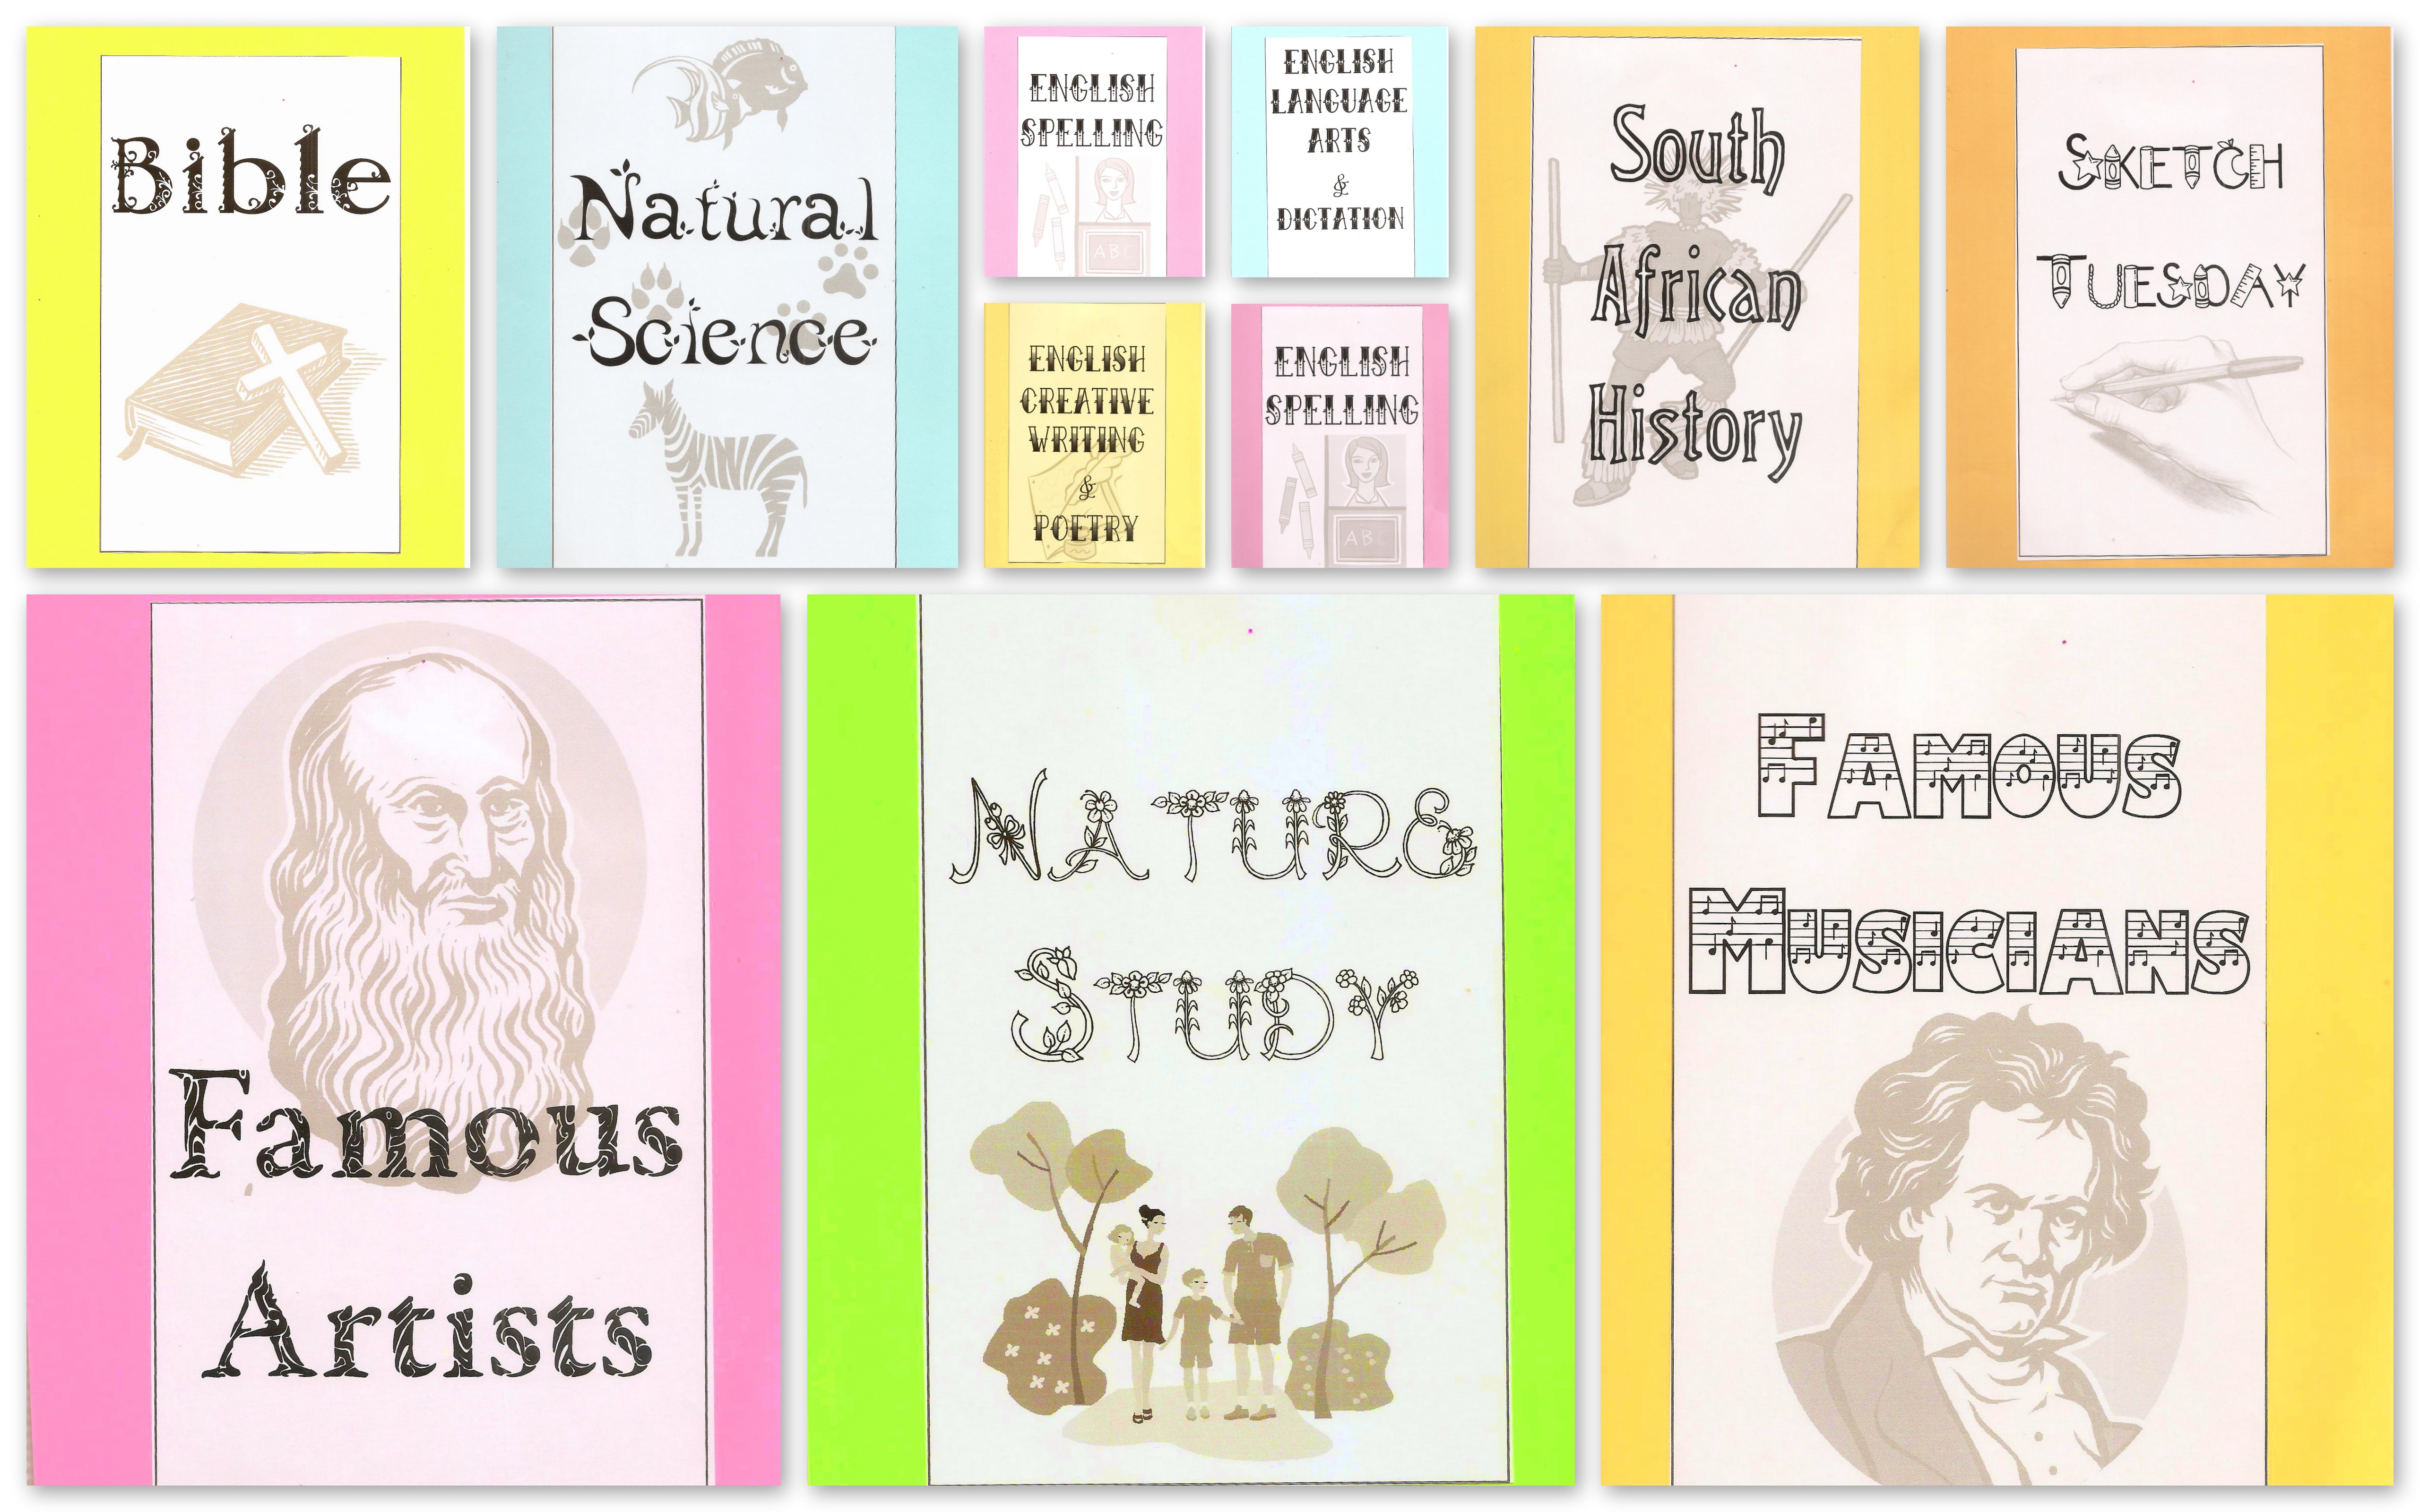
New Cover Pages

We use notebook files for all our schoolwork.

Each year I create fresh dividers for each subject.

Here are the latest cover pages for 2012 ~

I used a variety of fonts and clipart for each subject.

You are welcome to download these

and use them as is  ~ Cover Pages Variety pdf

or Word doc to make your own changes ~ Cover Pages Variety docx

Blessings,

A Little House Notebook

We all love the Little House books by Laura Ingalls Wilder!

We use the free Little House lapbooks downloaded from Homeschoolshare.com for each book in the series.

This year my 12-year-old-middle-schooler-who-thinks-she’s-junior-high asked for notebook pages instead of doing a lapbook.

I could see this transition coming.  As she has matured, she readily writes lengthy and detailed narrations in her History notebook pages.

I created simple Little House notebook pages, using the question prompts from the lapbook download instructions.

Both children still cover the same work, but present it differently.

Little House Booklet with duct tape binding for easy filing

Miss K12 asked for a small booklet, so I formated it to A5 (half the size of normal print paper).

I included a new vocabulary page and I made her several blank pages for her to illustrate while I read aloud.

Here’s your free download ~ Little House on Plum Creek A5 Notebook

Little House Booklet inside

I’m delighted with her lovely, detailed narrations …

Little House booklet notebook pages

… and her beautiful drawings.

Little House booklet illustrations

My 9-year-old still loves doing lapbooks.  She feels comfortable with the small size of the minibooks.  She happily fills them and often still needs more space.

Inside the Little House Lapbook

She, too, will prefer writing her narrations in notebook pages soon.

Our combination pages are a good middle ground for this transition. We often paste minibook elements on a notebook page and it adds detail and dimension.

My youngest child still needs my help writing longer narrations.  She starts writing her own narration, and I give her correct spelling prompts when needed.  If she gets bogged down in tiny details, I encourage her to make her write short, clear sentences and make her point.

Quite often she get physically tired of writing (it is really hard work), but her brain is still full of ideas.  Rather than let it become a slog, I play scribe and she enthusiastically dictates her flow of thought.

Lovely.

Satisfying for both of us.

I love my children directing some of their homeschool choices.  It keeps them motivated.  The freedom and individuality are the most wonderful part of a tailor-made education!

How do you allow for preferences and differences in your homeschooling?

Blessings,

Organizing our Nature Study Notebooks

We’ve  just started regular Nature Study with Outdoor Hour Challenge with Barb at her blog  Handbook of Nature Study.

Typically, I spent about 3 days organizing the sudden wealth of pages I downloaded from her site …

  • How to get started
  • Outdoor Hour Challenges
  • Notebook pages (from my NotebookingPages.com purchased cd as well as Barb’s free pages)

and then I made some of my own new Nature Study pages

  • Dividers for the 4 seasons:
  • Spring
  • Summer
  • Autumn (Fall)
  • Winter
  • Tree Study
  • Leaves
  • Nature Study Cover pages for the children’s files

These pages are for my use, but I wanted to share them here for your Nature Study file ~

apologies for uploading these files after publishing 🙂

Blessings,