Art Era Timeline 4 ~ Modern Art

Here is the 4th Art Era Timeline!

Did you downloaded the earlier  Art Era Timelines?  I f not, please pop over to Art Era Timelines under my Free Pages and download the previous 3 timelines. Due to the size of the files I have broken the timeline into 4 sections.

I have provided a basic definition of each art movement and included the dates and  names of  the founders and the most eminent artists of that movement. Each artist has a thumbnail of their work. I have placed each art movement on a new page for clarity and to aid the study of different eras.

Click here for the 4th Art Era Timeline featuring Modern Art ~ Art Era 4 Timeline Modern

Here is a slide-show sampler:

This slideshow requires JavaScript.

These are the Art Movements featured:
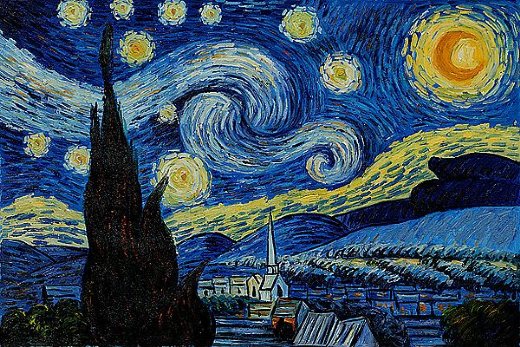
One of several versions of the painting

Image via Wikipedia

  • Modernism
  • Expressionism
  • Die Brücke
  • Der Blaue Reiter
  • Die Neue Sachlichkeit
  • Bauhaus
  • Cubism
  • Dada
  • Futurism
  • Neo-Plasticism
  • Surrealism
  • Precisionism
  • Art Deco
  • The Harlem Renaissance
  • Abstract Expressionism
  • Pop Art
  • Op Art
  • Arte Povera
  • Photorealism
  • Minimalism
  • The Sensation Show
  • Folk Art

Some ideas on how to use this timeline:

  • Print it bind it and create an Art Book of Centuries.
  • Add these pages to a student’s own Book of Centuries.
  • Cut and paste the pages side-by-side as a continual art timeline. (It will be huge! :))
  • Cut out and add the artists and their art work thumbnails to a dedicated art timeline or an existing timeline.
  • Cut the artists as cards, laminate them and let children match the artists to the eras.
  • Use the information and write your own artists on your own timeline as you study them.

I downloaded all the information for these timelines from Artcyclopedia.com.

Have you downloaded all the other Free Famous Artists and Impressionist Artists Pages?

Art Appreciation ~ Cezanne Fruit Still Life

This week we started our study of Cezanne, a famous Post-Impressionist artist.

As this was our introduction lesson,we read Cezanne’s biography.  (During our next lesson we’ll revise his life story and the children write a narration of his biography on our Famous Impressionist Biography pages.)

I found a video showing about 5 minutes of his works with pleasant background music at Ambient Art – Cezanne.

For this week’s art lesson we chose to focus on Cezanne’s fruit still life paintings.  (Next week I think we will study his landscapes …)

Cezanne described the shapes that he found in nature as cubes, cones, cylinders and spheres.

We looked at how to shade a sphere at Learn To Art,  and we found this picture at www.artinstructionblog.com showing the highlights and shadows very helpful:

Drawing Lesson - Understanding Light

We found this wonderful example of how to draw fruit using coloured pencils at www.painters-online.co.uk:

Plum in the Middle

And there was An Easy Beginner Drawing Lesson showing how to do a pencil sketch of a pear at drawsketch.about.com

Now we were ready to draw.

Miss.L decided to sketch and colour the painting of Glass and Pears which we had in our book Impressionist Painters by Guy Jennings.  She needed a little help with her contour lines, on the first few pears, but quickly got the hang of shading with 3 different shades of each colour.  She started with the lightest colour, then the middle shade and then completed each fruit with the darkest colour at the edges, and created shadows.

Inspiration and Sketch

Glass and Pears by Miss.L (nearly 8 yrs)

Miss.K and I sketched the apple still life I set up to resemble Cezanne’s Apples and Oranges (except I didn’t have any oranges.)  She quickly mastered the shading technique we studied, and her apples turned out very well.  I spent at least an hour longer on my sketch and thoroughly enjoyed my art time.

Still Life and sketch

Apple Still Life by Miss.K (10 yrs)

And this is the sketch I completed:

Nadene's Still Life

I hope to do a few more Cezanne picture studies in the next weeks.  We have our Famous Impressionist Lapbook minibooks printed and we will use the Cezanne’s minibook to conclude our Cezanne study.

What Cezanne activities have you and your children enjoyed?

(PS: I have updated all the references and links as the orignal links no longer worked.)

3D Model of Seurat’s “Bathers at Asnieres”

We really enjoyed Seurat’s first masterpiece “Bathers at Asnieres”.

Bathers at Asnieres

Following Charlotte Mason’s approach to art appreciation the girls quietly studied a print of this work and then orally narrated what they remembered in the picture.  I read a short biography and they wrote their biography on our Famous Impressionist Biography notebooking pages.

In our last Seurat study, we found real life photos depicting his “Sunday Afternoon on the Ile de la Grande Jatte” and because his composition in “Bathers” is so formal and still, we decided to make a 3D model of this painting.

We only used what we had.  We looked at the size of objects, proportion and the layout. (A quick revision lesson about the laws of perspective!)

Setting up the river, the bank, bridge and backdrop

With a little prestick, some cardboard, Lego pieces,

Lego boats and people for in the distance

a few home-made rag dolls (that the girls play with instead of Barbie’s), some pins and a lot of fiddling

Rag doll model being positioned

and this was our result!

Our 3D model of Bathers at Asnieres

It took a lot longer than we expected.  It also required much less space because it all has to fit in the camera frame.  We were all really pleased with our ‘real life’ Seurat-inspired masterpiece.

Happy with the results!

I also prepared 6 pages of outline drawings of this painting which you are welcome to download ~ Outline Bathers at Asnieres

Outline drawing of "Bathers"

Here’s some ideas of what I may do …

  • Perhaps we’ll use it to paint and use ear buds to dab paint in pointillism style …
  • Maybe we’ll colour it in and cut it up and create our own puzzle (page 2) …

Puzzle - colour the picture and cut on dotted lines

  • Or we could divide it into quarters and enlarge each to make a large mural (page 3,4,5,6) …

1st quarter

2nd quarter

3rd quarter

4th quarter

  • Perhaps we could create a collage and paste coloured paper and material on the shapes …

What other ideas do you have?

Famous Musician Biography Pages

My latest freebie ~ Biography Pages for these famous musicians :

Ludwig van Beethoven, Johann Sebastian Bach, Wolfgang Amadeus Mozart, (Franz) Joseph Haydn, Wilhelm Richard Wagner, Antonio Lucio Vivaldi, Pyotr Ilyich Tchaikovsky, George Frideric Handel, Ralph Vaughan Williams, Sir Edward William Elgar, Edvard Hagerup Grieg, Jean Sibelius, Joseph-Maurice Ravel

These biography pages come in 3 formats ~

Famous Musicians Biography Blank ~ A blank notepage ~ excellent to use with minibooks or art appreciation lessons

Famous Musician Biography Red_Blue ~ With red & blue lines ~ for primary/ beginner writers

Famous Musicians Biography Black Lines ~ With black lines & grey dotted lines for middle school writers

Famous Musician Biography Blank

Famous Musician Biography Red & Blue Primary Lines

Famous Musician Biography Black Lines

I designed these notebook pages to go with the Famous Musicians Wall Chart. Have you already downloaded this?

I suggest you print the complete set of biography pages and keep them in your Notebook File.  Then they are ready for your child’s composer of the month study. You could use Charlotte Mason’s free curriculum on Ambleside Online as they offer a free Composer Schedule, online radio links and suggested book titles or biographies on famous musicians.

I hope to bring you a lapbook or minibooks to complete this bundle soon. Please sign up for an email notification or put my RSS feed on your homepage! You’ll find this on my sidebar halfway down.

Seurat’s “Sunday Afternoon on the Island” Art Appreciation

P1080814

I introduced the girls to George Seurat and studied his famous painting of Sunday Afternoon on the Island of Grande Jatte.

  • The children put up a photograph of George Seurat and a mini gallery of his works on our wall chart.
  • We read a simple biography on Garden of Praise and looked at a slide show of some his works.
  • We studied the painting of Sunday Afternoon in our coffee table book on Impressionist Artists with a magnifying lens to see his pointillism technique.
  • Then we looked at his painting online on artchive for a zoomed, full-screen view.
  • We discussed The 7 Laws of Perspective (we had learnt in our previous art lesson on Van Gogh) and we could easily find several clear examples in Seurat’s composition.
  • We also enjoyed seeing his painting re-created in real life in these photos.
  • I had printed out a black and white picture and traced this outline drawing (Here’s your free download ~Seurat’s Sunday Afternoon outline) for the girls.
  • I thought that we could divide the outline drawing into sections. They could select a part of the painting which I could enlarge for them on the photocopiers which they could paint in more detail, but they wanted to do the full painting.

Seurat’s Sunday Afternoon Outline

  • The girls first washed all the background areas and the people with the basic colour using watercolour paints.
  • Then they took ear buds and dipped it in the watercolour and used pointilism technique to fill in the details on the picture.  This was a good way of creating Seurat’s dotty painting style.  My 10 year-old tried to keep her colours unmixed (red dot next to blue dot to make purple and not using purple from the pallet.)
  • They discovered that they needed to paint all the people and trees first and then create the dotty effect.  The 1 child preferred to use a thin pointy paintbrush and not the ear bud to make her details stand out.

Painting dots with the point of her brush

  • A beautiful finished painting!  Done in about an hour and a half, with ease and enjoyment!

Miss. K’s completed painting

Next week we will use our George Seurat biography notebook page and write our biography and study this painting again, or move on to the next masterpiece.

In creating these art appreciation lessons I felt that my children needed only become familiar with the works and the techniques used by master artists.  They will surely recognise their reproduced art in books, in films and in galleries.  I offer outline drawings to keep the stress to a minimum, to offer a quicker route to the result.  As they get older, I hope they will reproduce aspects of art without this support as Charlotte Mason suggests.

I would like to quote extracts about “Picture Study” from my Charlotte Mason Study Guide by Penny Gardner, (pages 126 & 127)

“… Study one artist at a time so children can become aware of that artist’s style and can recognize his works even when a particular painting was not studied.  Six works the artists should be studied.

You may first want to introduce the artist.  Tell enough about the artist to get the kids familiar with him, avoiding inappropriate personal details where necessary.  Sometimes you can find a picture book or a short biographical story about the artist, after the reading, to include in the notebook.

During the picture study sessions, let the children quietly look at the picture.  After they have had a couple of minutes to take it in, turn the picture over and ask for a narration. You’ll be amazed at the details children pick up – at their power of observation.

In another picture study session, let the child look at the same picture again.  Turn the picture over, after  a couple of minutes, ask for a sketch of the painting.  The third week, you might ask the child to make up an imaginative story that could possibly be behind the picture.  For the last week, you might ask for a verbal or pictorial narration of the same painting after studying it anew.  Place narrations and sketches in the notebook you are creating.”

Most mom’s avoid doing art lesson due to the mess and stress.  I have found Charlotte Mason’s method and approach liberating!  If my sample lessons offer any encouragement to take out some paints and crayons – that is a bonus!  Enjoy!

Van Gogh’s “Bedroom in Arles” Finding Perspective

Van Gogh’s Bedroom at Arles

Like our other Van Gogh art lessons, where I use an outline for our art appreciation lesson, I downloaded an outline drawing of Bedroom at Arles, which we coloured in using felt-tipped pens.

I found the Seven laws of Perspective at Heart Of The Matter Online.com and looked for a way to implement these principles in our Van Gogh Appreciation lesson.

We used several other art books to look for examples of these laws of perspective.  A quick and simple art appreciation lesson!

Here are my notes ~ Seven Laws of Perspective with simple outline diagrams of the perspective principles. Click on the link for your free download.

Famous Artists Lapbook ~ loads of minibooks!

This Famous Artist Lapbook features ~

Leonardo da Vinci, Michelangelo di Lodovico, Raffael Sanzio da Urbino, Sandro Botticelli, Anthony van Dyck, Rembrandt van Rijn, Johannes Vermeer, Francisco Goya, Pablo Picasso, Auguste Rodin, Peter Paul Rubens, Salvador Dali, Henry Moore and Paul Jackson Pollock

I have created a ‘blank canvas’ type lapbook as each minibook is blank and the thumbnails are separate.  This means you can use the download as it is and cover every artist, or you could use the minibook templates and use them to feature several works of 1 artist. There is an organized lapbook planner with web site links as well as a page of extra application ideas.

Here some samples of the 20 pages:

Famous Artist Lapbook planner 1

Applications & Ideas

Leonardo da Vinci

Michelangelo

Rembrandt Van Rijn

Raphael da Urbino

Sandro Botticelli

Sandro Botticelli

Salvador Dali

Salvador Dali

Peter Paul Rubens

Pollock

Auguste Rodin

Anthony van Dyck

Pablo Picasso

Matching Masterpieces

Pockets of paintings & sculptures

Who is the artist pentagon petal minibook

Click here for your download ~ Famous Artists Lapbook

The Famous Artist Lapbook is an excellent addition to the Famous Artist Wall Chart and the Famous Artist Biography Pages.

Copyright © 2015 Nadene Esterhuizen

All rights reserved.  Please email me for permission granted for personal use only.  No part of this publication may be shared, stored, sold, reproduced, or distributed without my written consent.

I have created a simple lapbook base from which you may launch in any direction!  You may want to use each minibook or its suggested activity or create this lapbook in your own way.

  • You can use these pages as they are.  Cut and paste the name of the artist on the front of each minibook.
  • All the minibooks have been left blank so that you may pick and choose the style you need or prefer.
  • Let your child write Charlotte Mason-type narrations (detailed and accurate recall) of the art work inside the minibooks for art appreciation lessons.
  • You could cover just 1 artist and use the collection of minibooks to do several minibooks on his different works.
  • Collect all minibooks and assemble a lapbook on the entire topic or featuring 1 artist.  Let your child assemble the lapbook when they complete the whole unit.

Latest Famous Artists Biography Pages

Here are 14 Famous Artist Biography Pages to accompany the Famous Artist Wall Chart.

These biography pages are presented in 3 formats ~

Biography Famous Artists Blank ~ A blank notepage ~ excellent to paste in minibooks or art appreciation lessons

Biography Famous Artists Red_Blue ~ With red & blue lines ~ for primary/ beginner writers

Biography Famous Artist Blackline ~ With black lines & grey dotted lines for middle school writers

Biography Famous Artist Blank

Biography Famous Artist Red&blue

Biography Famous Artist Black lines

And these are the famous artists covering several centuries, styles and mediums:

Leonardo da Vinci
Michelangelo di Lodovico
Raffael Sanzio da Urbino
Sandro Botticelli
Anthony van Dyck
Rembrandt van Rijn
Johannes Vermeer
Francisco Goya
Pablo Picasso
Auguste Rodin
Peter Paul Rubens
Salvador Dali
Henry Moore
Paul Jackson Pollock

(I acknowledge that this is not a comprehensive list.  If you would like a specific artist featured, please leave your request in the comments below.)

Click here to download more free Biography Pages

To complete this theme I will soon release a Famous Artists lapbook bundle. Please sign up for an email notification or put my RSS feed on your homepage! You’ll find this on my sidebar halfway down.

Da Vinci, Michelangelo and more ~ Famous Artists Wall Chart!

Launching ~ Famous Artists Wall Chart!

Recently I featured the Famous Impressionist Artists bundle, and this included a lapbook & minibooks, biography pages, and an A4 wall chart on each artist. Here is the new Famous Artists Wall Chart!

Pictures, mini-gallery & biography on each artist

The Famous Artists Wall Chart features:

  • Leonardo da Vinci
  • Michelangelo di Lodovico
  • Raffael Sanzio da Urbino
  • Sandro Botticelli
  • Anthony van Dyck
  • Rembrandt van Rijn
  • Johannes Vermeer
  • Francisco Goya
  • Pablo Picasso
  • Auguste Rodin
  • Peter Paul Rubens
  • Salvador Dali
  • Henry Moore
  • Paul Jackson Pollock

Included in this 17 page pdf. download is a brief biography of each artist and  a mini-gallery of their works.  This A4 page layout could also be added to a mini office.  Use the chart (as Charlotte Mason suggests) to feature one artist a month and study his  works.

To complete this theme I will soon release a Famous Artist Biography bundle and a lapbook and minibook bundle. Please sign up for an email notification or put my RSS feed on your homepage! You’ll find this on my sidebar halfway down.

Other Web Sites on these artists are:

http://gardenofpraise.com/art.htm – with lovely games, worksheets, biography and slide show of works

http://library.thinkquest.org/J001159/famart.htm

http://wwar.com/artists/

http://www.ibiblio.org/wm/paint/auth/

http://www.artquotes.net/masters.htm

Suggestions and practical tips:

  • Laminate all the portraits and gallery pictures. (These could be re-used each few years.)
  • For review, play a matching game and match the gallery to the correct artist.
  • Let your children research and find 3 more art works to add to the gallery.
  • Expand each biography and let your children give 5 – 8 facts about the artist studied.
  • Write a biography on the artist
  • Make a minibook/ lapbook on a masterpiece or artist/ artistic style or era
  • Let your children study at least one art work in-depth.  Let them narrate as many details as they can after some time studying the picture.
  • Make a sketch or reproduce their own version of their favourite art work for each artist.
  • Try different art mediums through the year ~ sculpture, splatter paints, water colours, pen & ink, charcoal, make prints, collages, oil paint/ acrylic paints, photographs etc. …
  • Try find additional coffee table books, library books, calendars or posters with Art from as many eras as you have studied
  • Make an Artist Time Line.
  • Enjoy art!

I acknowledge that this is not a comprehensive list, but the selection covers several centuries and demonstrates the variety of artists and their styles.  I hope you and your children enjoy these pages!

Van Gogh “Starry Night” ~ Art Appreciation

We enjoyed another delightful Van Gogh Art Appreciation activity which is suitable for young children and middle schoolers!

Starry Night

I saved the image and used it as a screen saver on our computer.  This is a good way to see the image often during the week.  Also, we could zoom in and really look at his brushstrokes, colours and details full-sized.

Next I traced the Van Gogh Starry Night outline – click the link for your free pdf download.  (Read about how I trace outlines of famous art works here.)   

I used the outline to save the girls time copying the drawing or using a grid, because there is so much detail in the picture and I wanted to spend the lesson time coloring and painting instead.

We used oil pastels.  First the girls coloured only the white and yellow areas on the white outline page with oil pastels.  This was not easy because you can’t see white on white!  And it had to be coloured in little strokes like Van Gogh’s.

Finding and filling all the white and yellow areas

Then we washed the page with black water-colour.  This was to have a dark background between the little strokes and to give a night-time feel to the picture.  The white and yellow moon, stars and windows really stood out!

Washing the page with black water-colour

Now the girls started to fill in areas.  They filled in the rest of the picture with all the blues, greens and other colors, using several different types of oil pastels; some thick and greasy, others with many shades of colours.  We all pressed hard to make thick, short stokes on the paper.  They sat at the computer, zoomed in and really looked to see what colours Van Gogh used.  This took some time, but already they were happy with their art as it began to look more and more like the masterpiece!

The dark greens, blacks and greys of the Cyprus tree

Swirling blues, whites and greys of the sky

All done, in just an hour or so!  They really appreciated how long Van Gogh must have worked on this masterpiece, how many colours he dabbed on the canvas and how these colours created movement and mood.  They loved this lesson!

Van Gogh’s Starry Night by Miss K, 10 years old

Van Gogh’s Starry Night by Miss L 7 years old

Here are some links I used to prepare this lesson:

Pop over to my Art Page for all the other art appreciation lessons.